| Author |
 Topic Topic  |
|
|
carlb1981
Fully Grown Royal

United Kingdom
1527 Posts |
 Posted - 11/09/2013 : 18:43:10 Posted - 11/09/2013 : 18:43:10


|
Thought i would put a step by step guide for making a rack out of the ikea pax system wardrobe frame. For this one i have used the 75x58x201 frame but they also do them in 2 other widths (50 and 100) and another depth (35 instead of 58) and another height (236 instead of 201) so for this one you will be able to fit 2 x 12l rubs per shelf or 1 x 33/50l per shelf length ways with 9 shelves so that's 20 12l rubs by using the bottom or 10 x 33l. Obviously if your using it as a hatching rack with smaller rubs you'd fit a lot more or if you want 50l and or taller you'd fit less. Just to add with the 100 wide rack you fit 3 x 12l rubs per shelf so room for 30 ickle snakeys on that one lol or 2 33/50l per shelf with the rub overhanging slightly which is fine as that's how my other rack is set up.
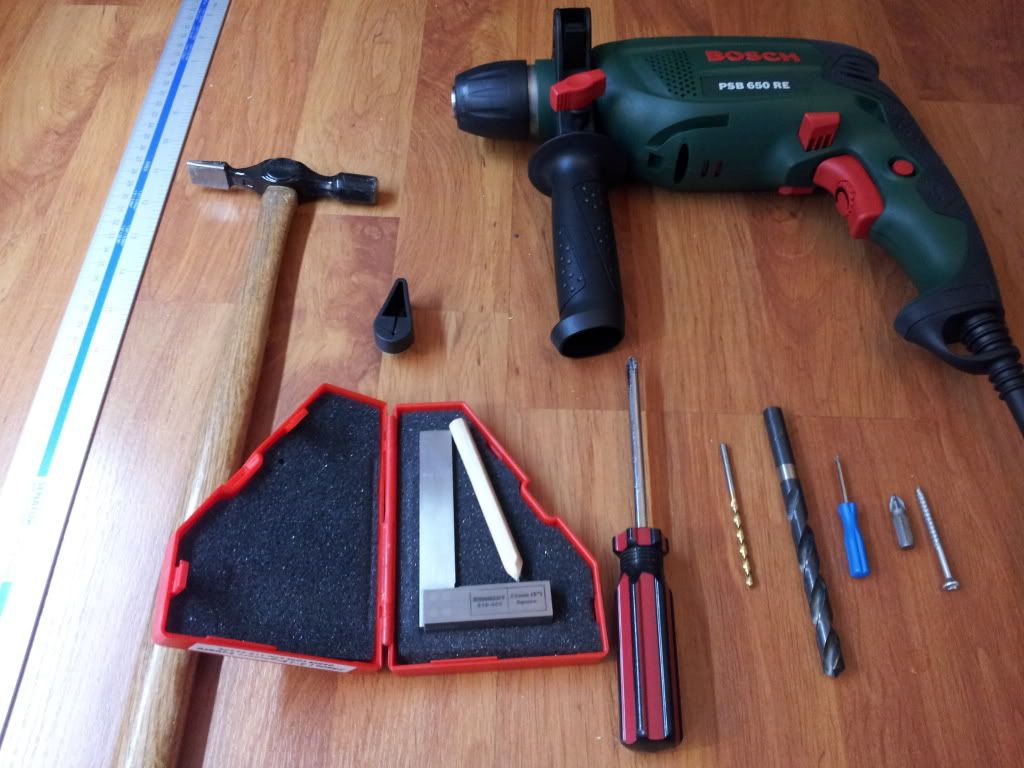
So here we go tools i used;
Small hammer
electric drill
1 meter rule
square
pencil
posi drive screwdriver
posi drive drill bit
3mm drill bit
9mm drill bit
small watch screwdriver or similar
4 x 50mm screws(i used 2 per shelf)
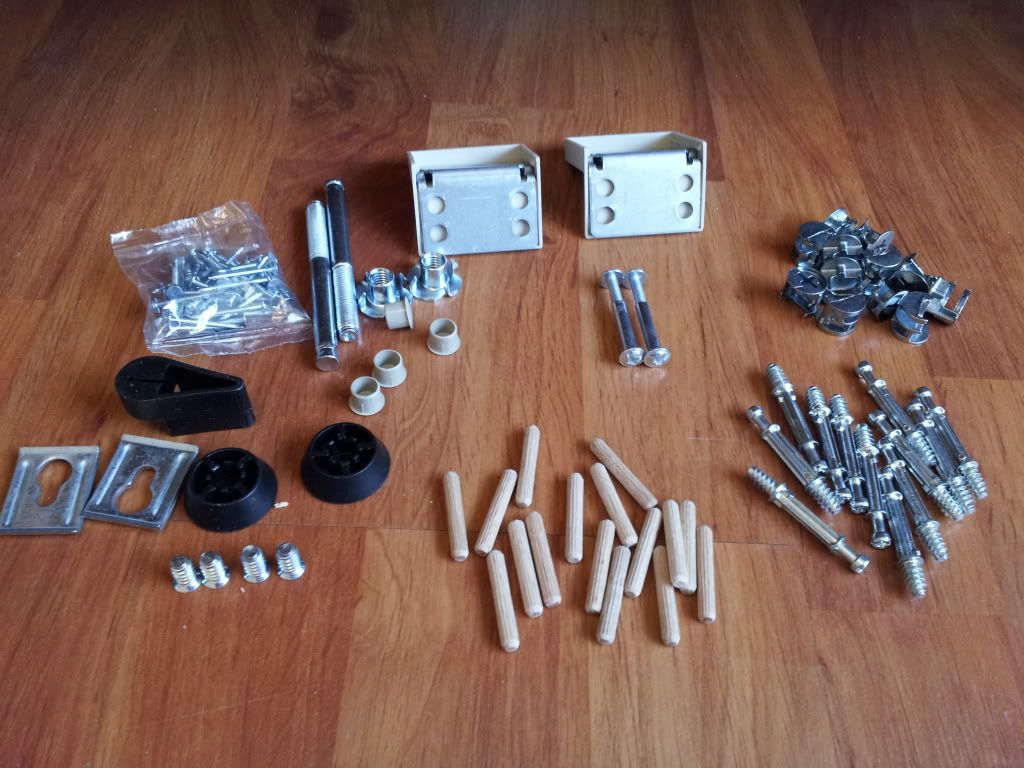
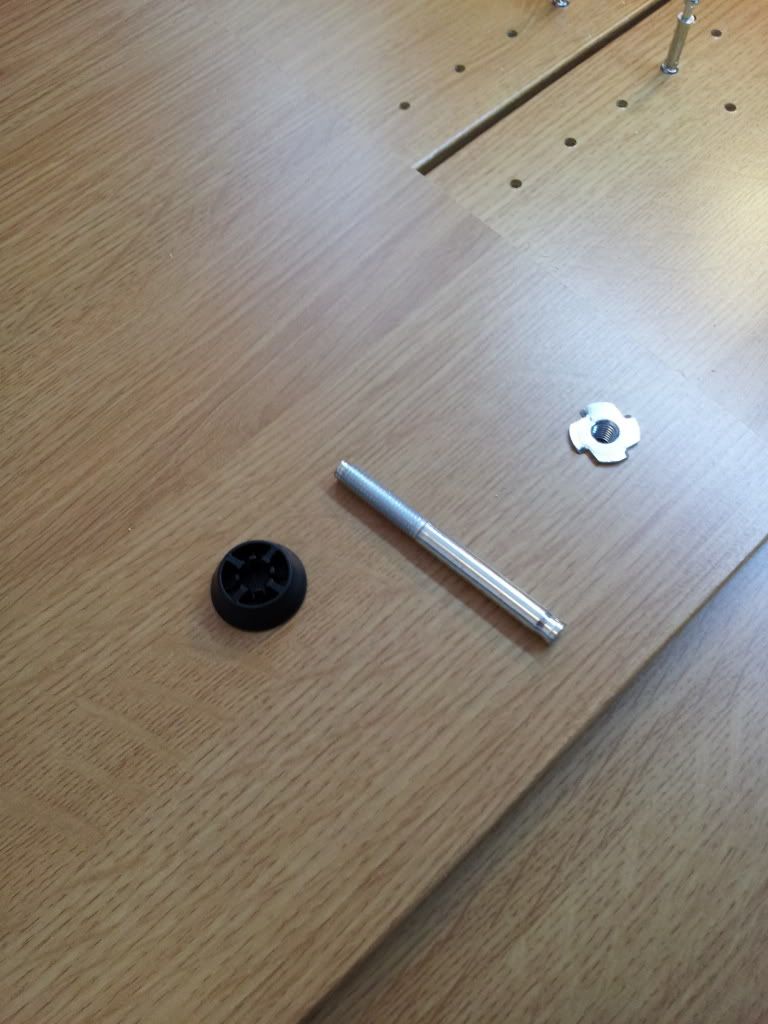
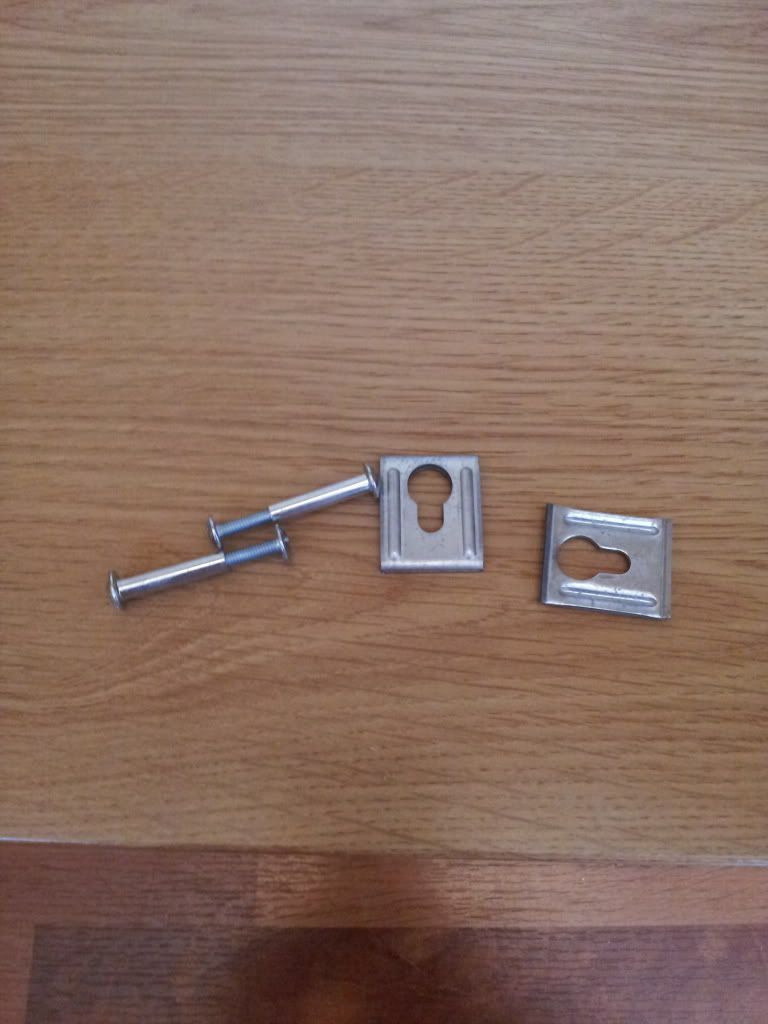
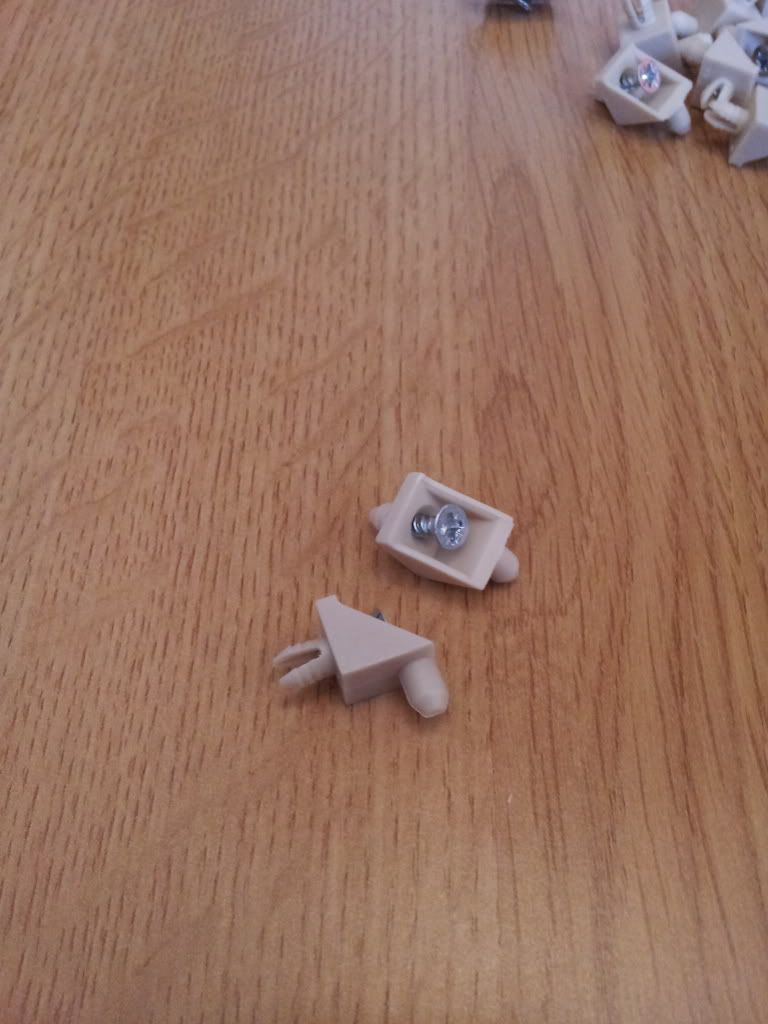
These are the fittings that come with the wardrobe frame
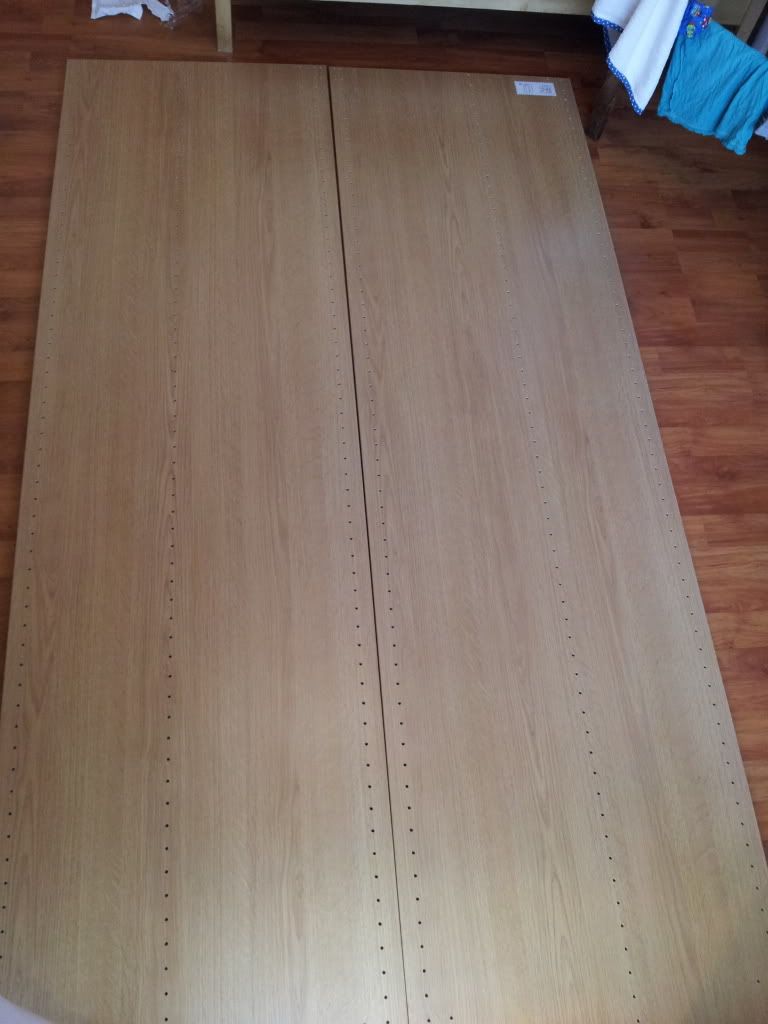
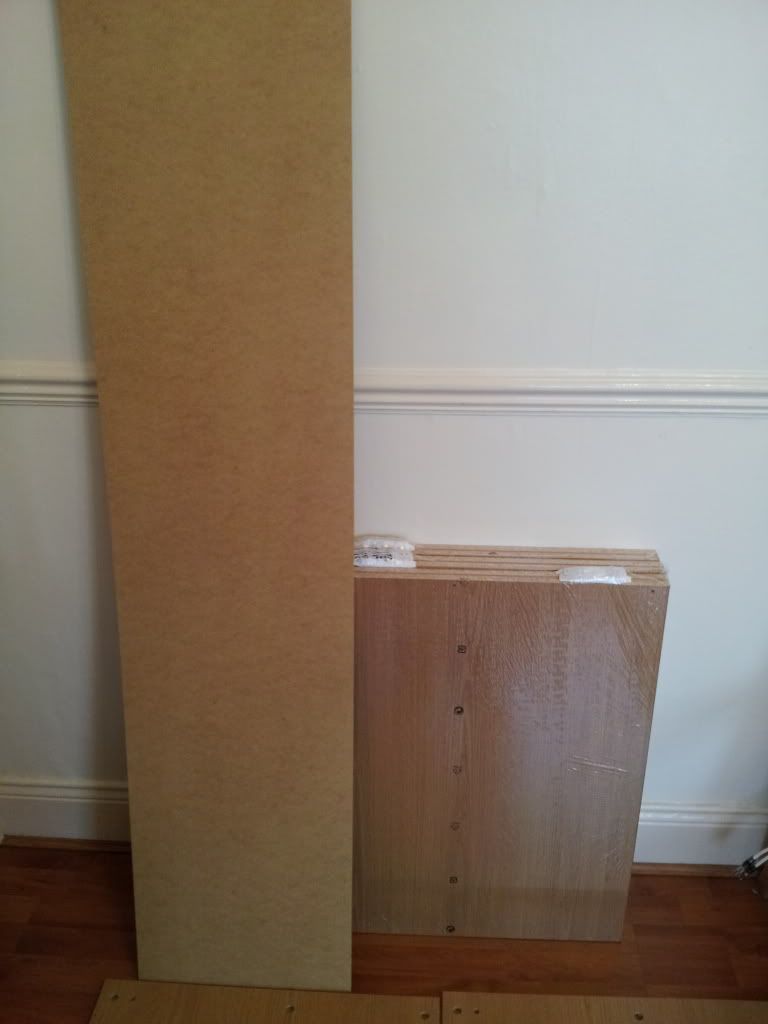
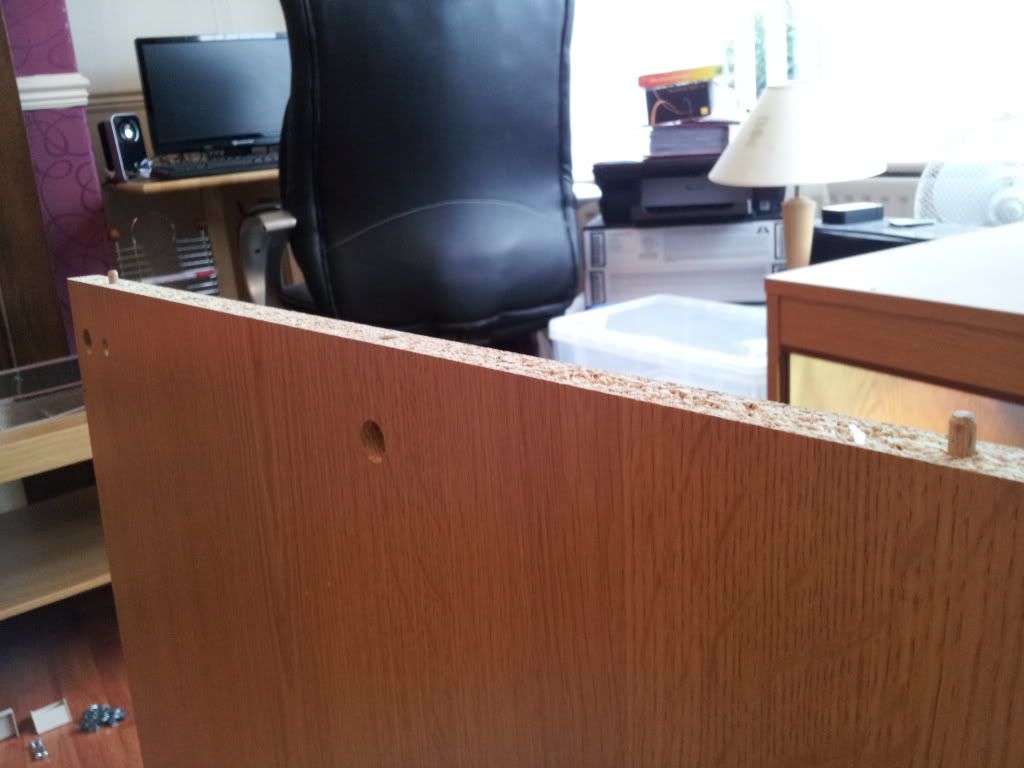
Sides of frame come pre drilled for fittings and shelves both sides are identical so there's no mixing them up
Base and top pre drilled as above
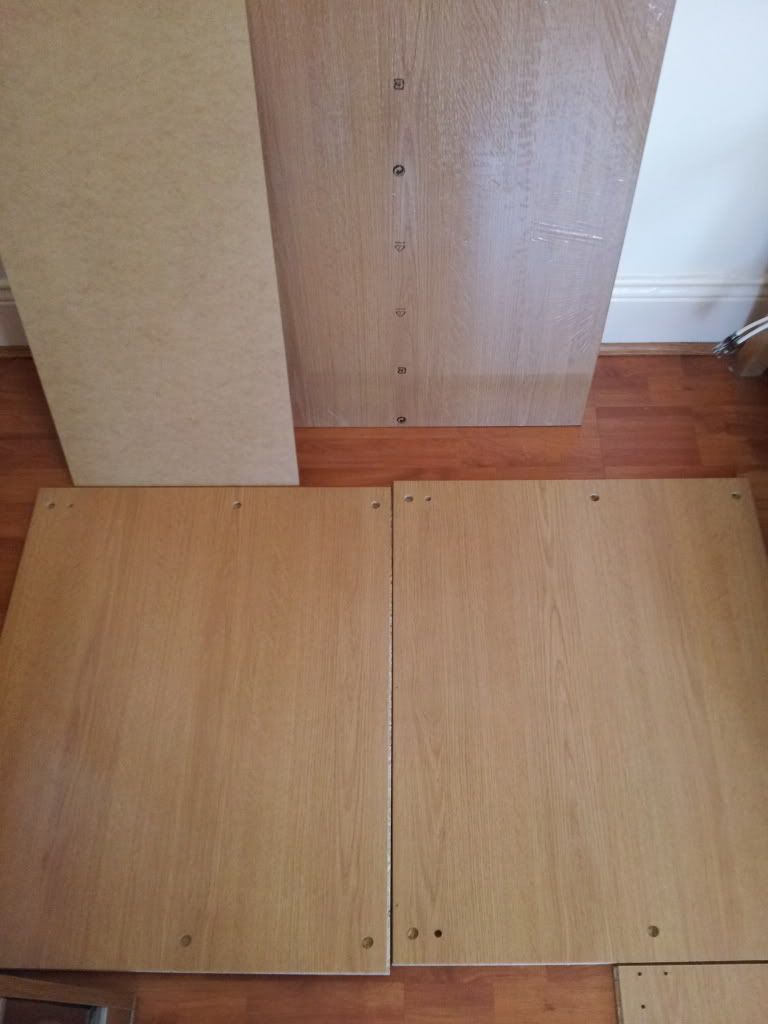
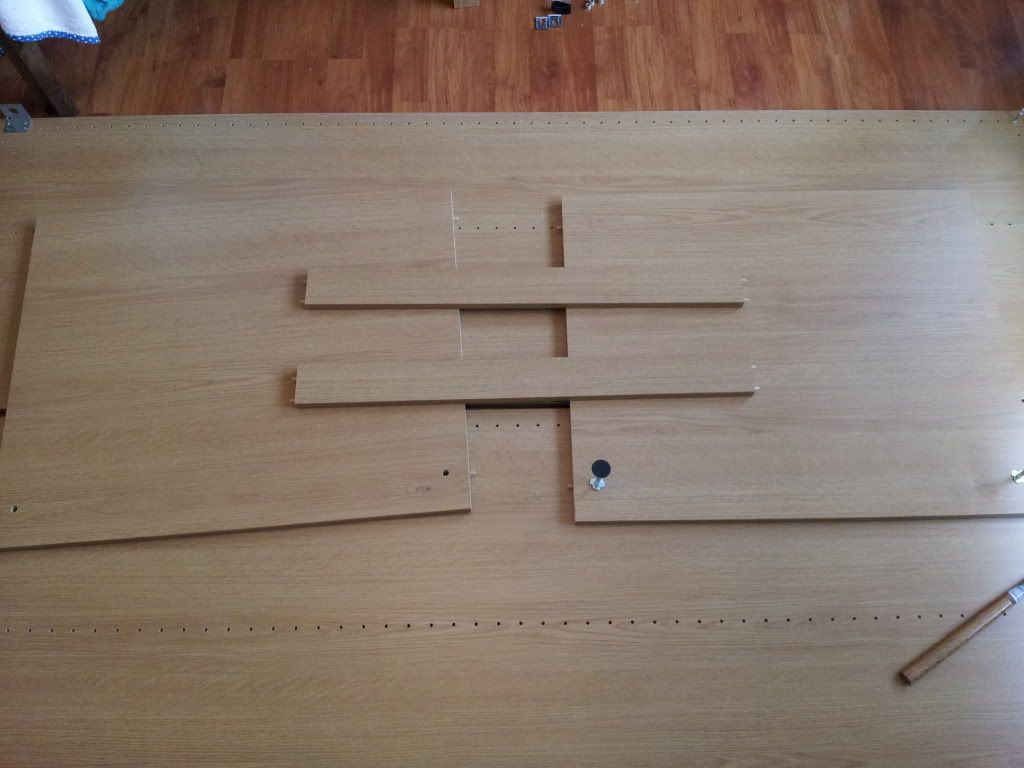
The back panel and the packs of shelves(2 per pack)
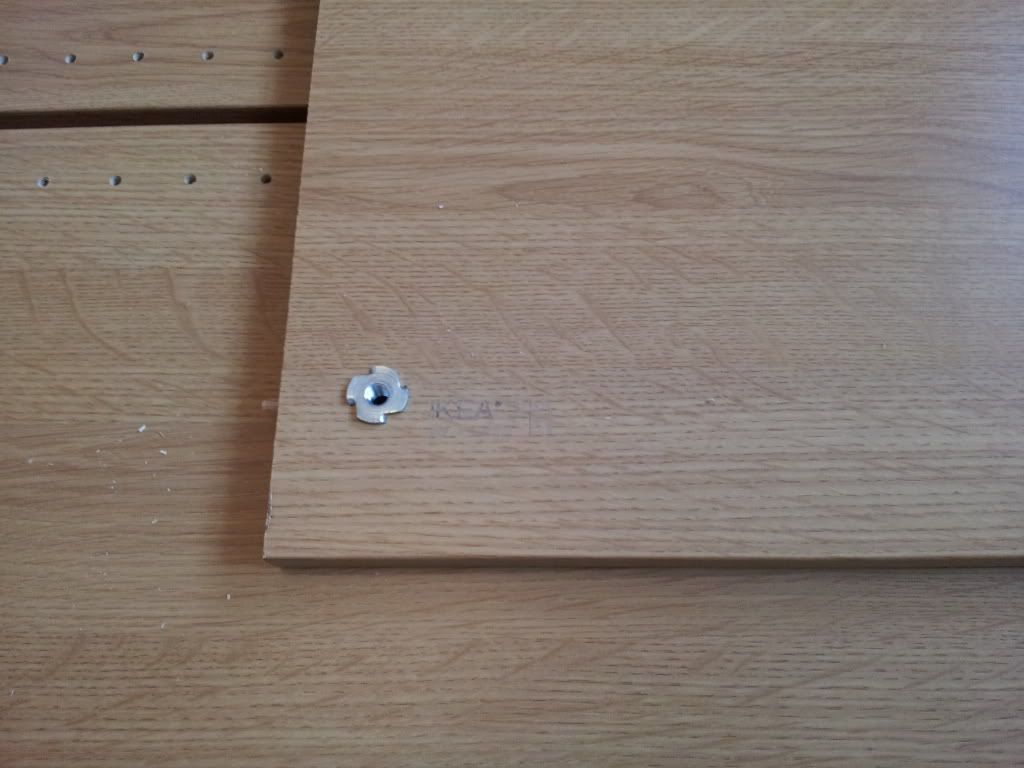
So first off screw the relevant fittings into the side panels
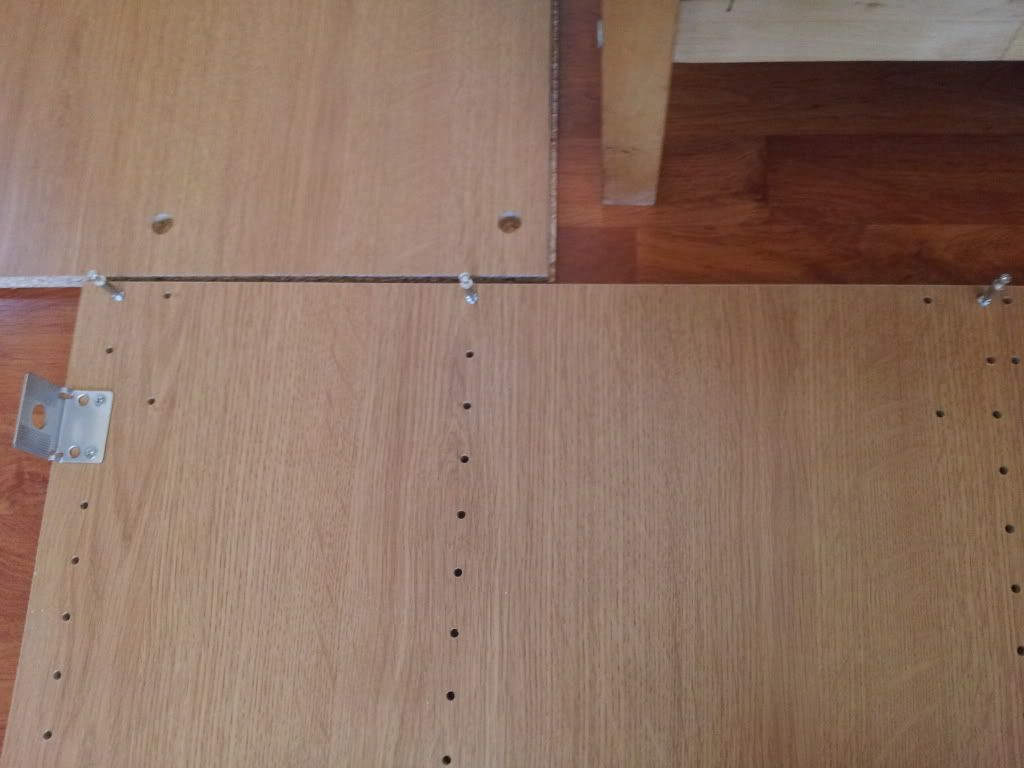
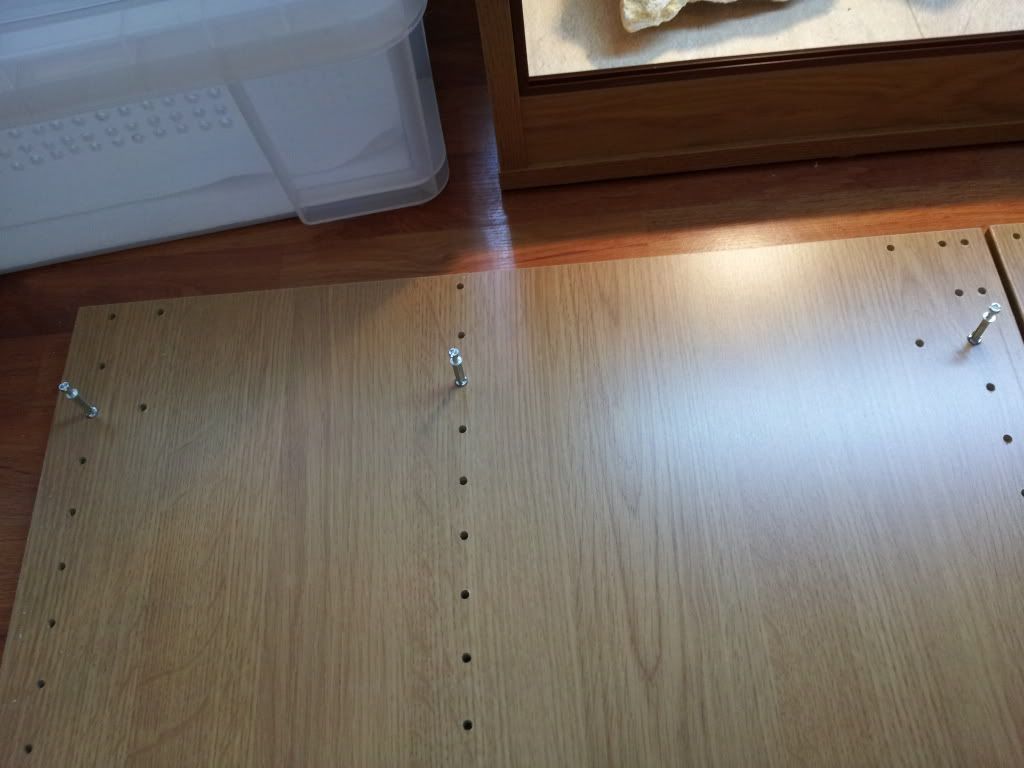
then dowels and fittings fitted into base, top and plinths
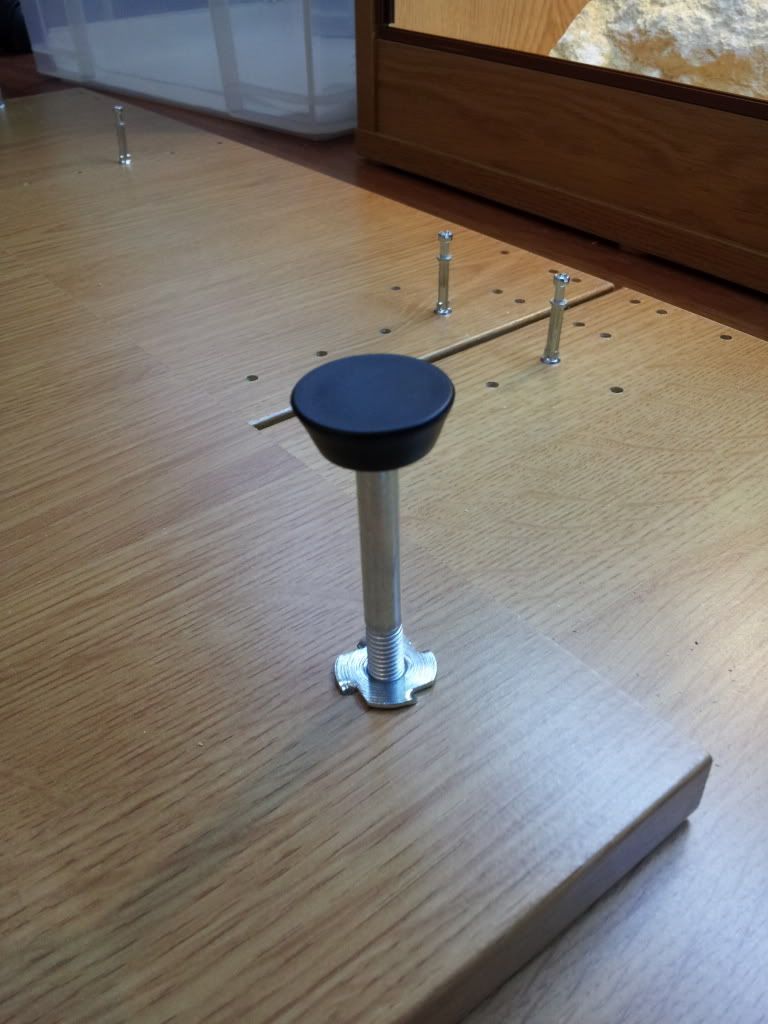
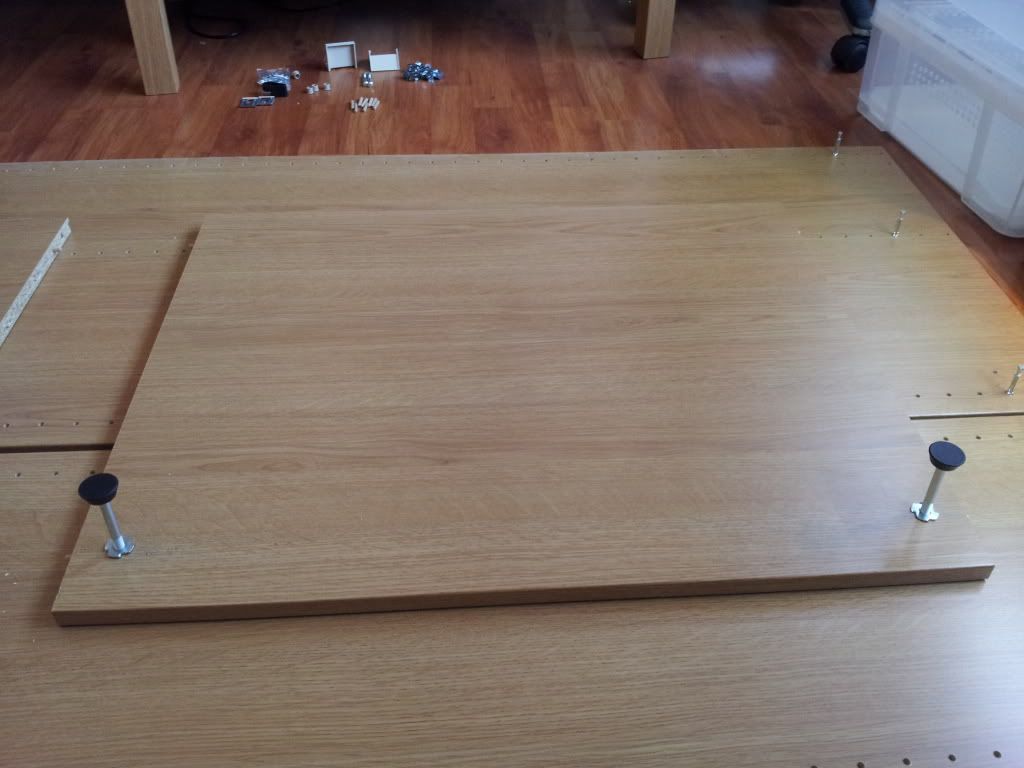
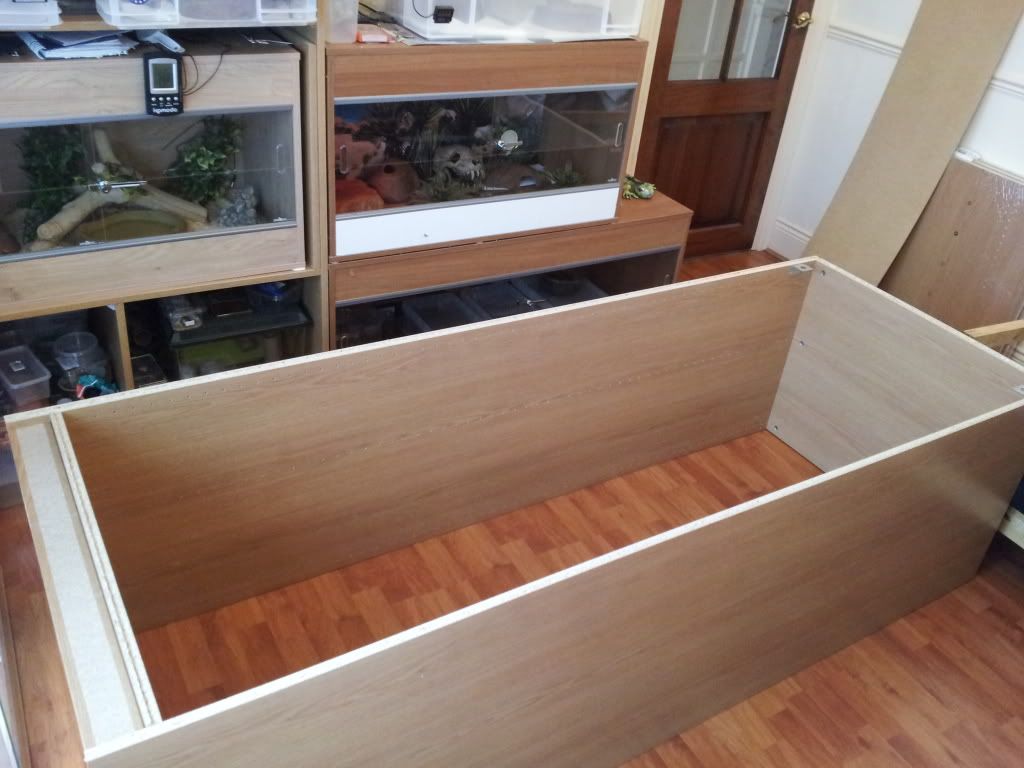
Then place the base plinths and top into position on one of the sides then fix in place with the clamp fittings

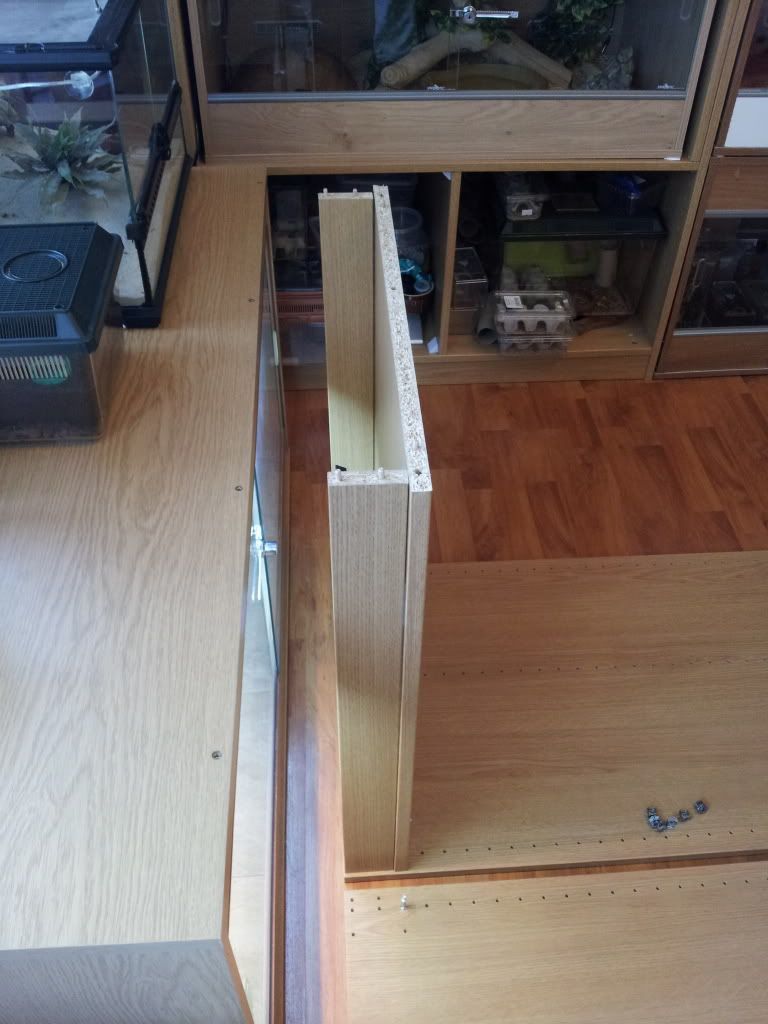
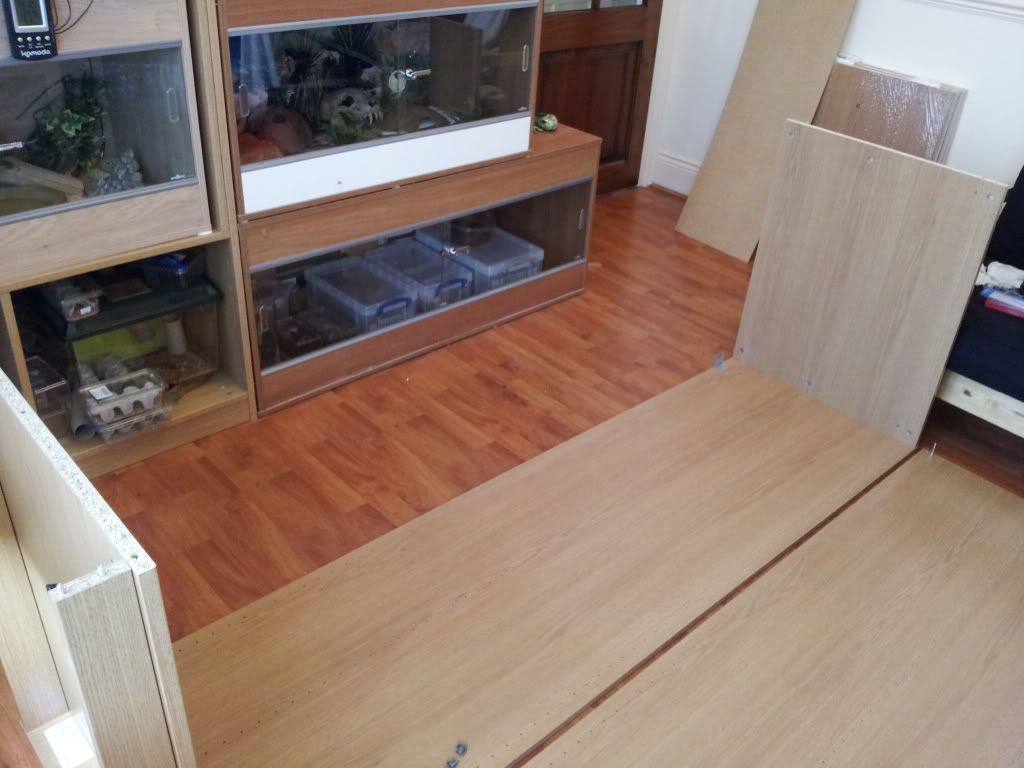
then place the other side on top in position and same again with the little clamp fitting things, i was sweating buckets by this point working in a room that's 26�c lol
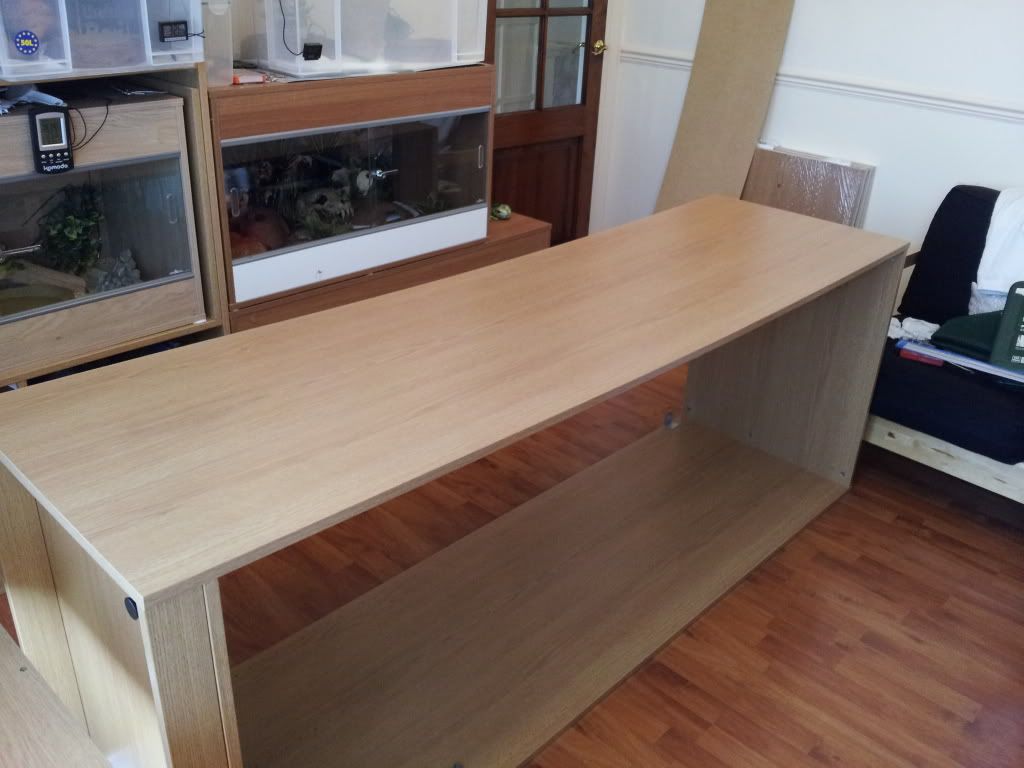
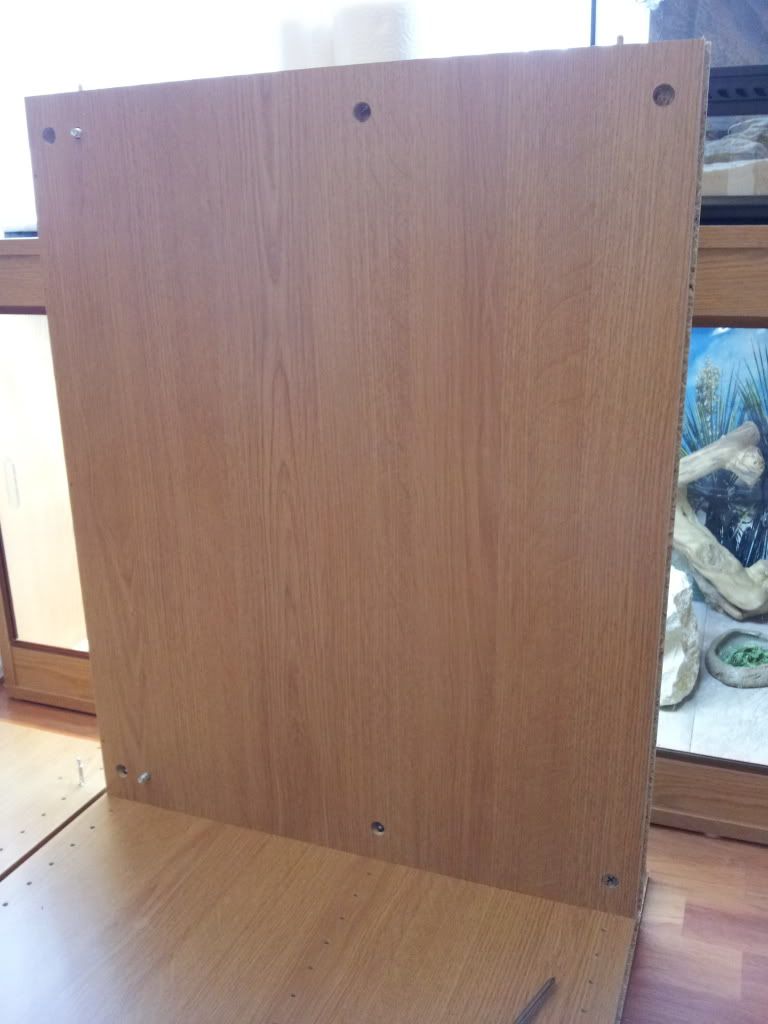
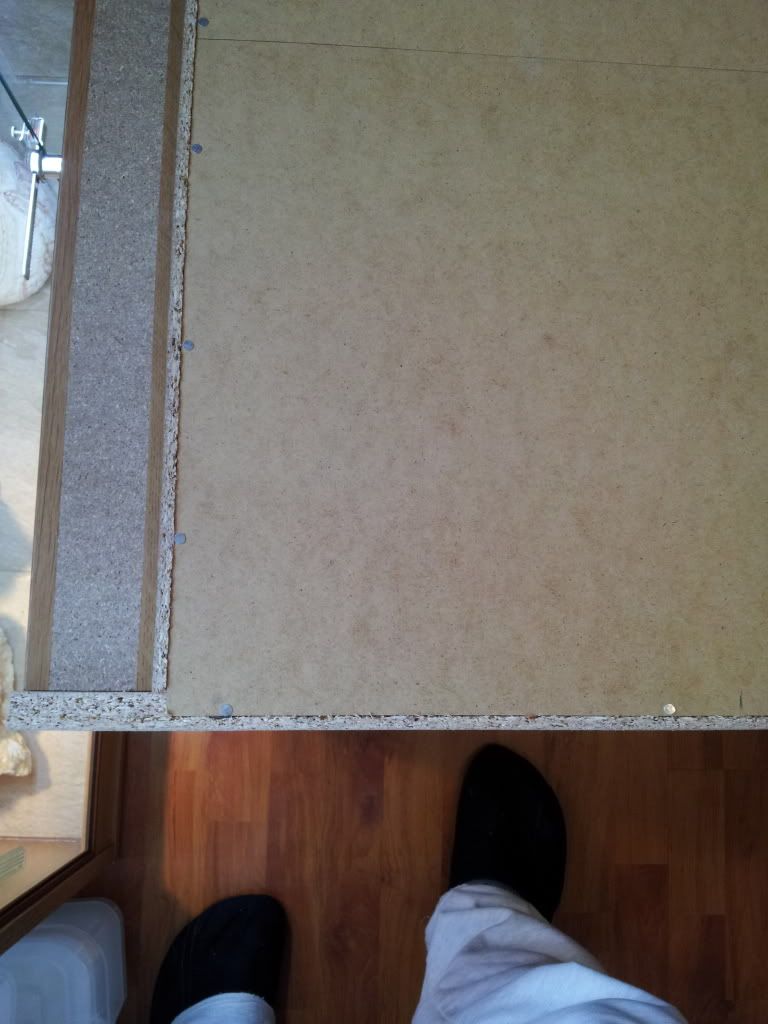
Then flip it over onto its front and fit back panel and follow instructions to square it up hammering 1 nail in bottom corner then 1 in top on same side and continue all the way around
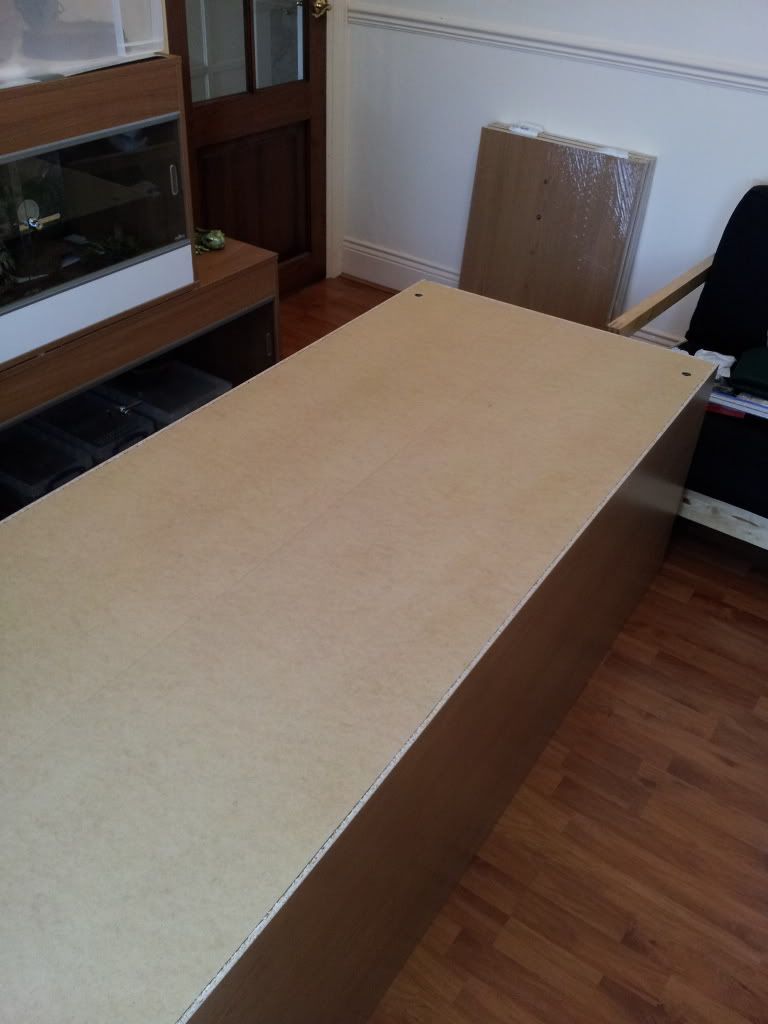
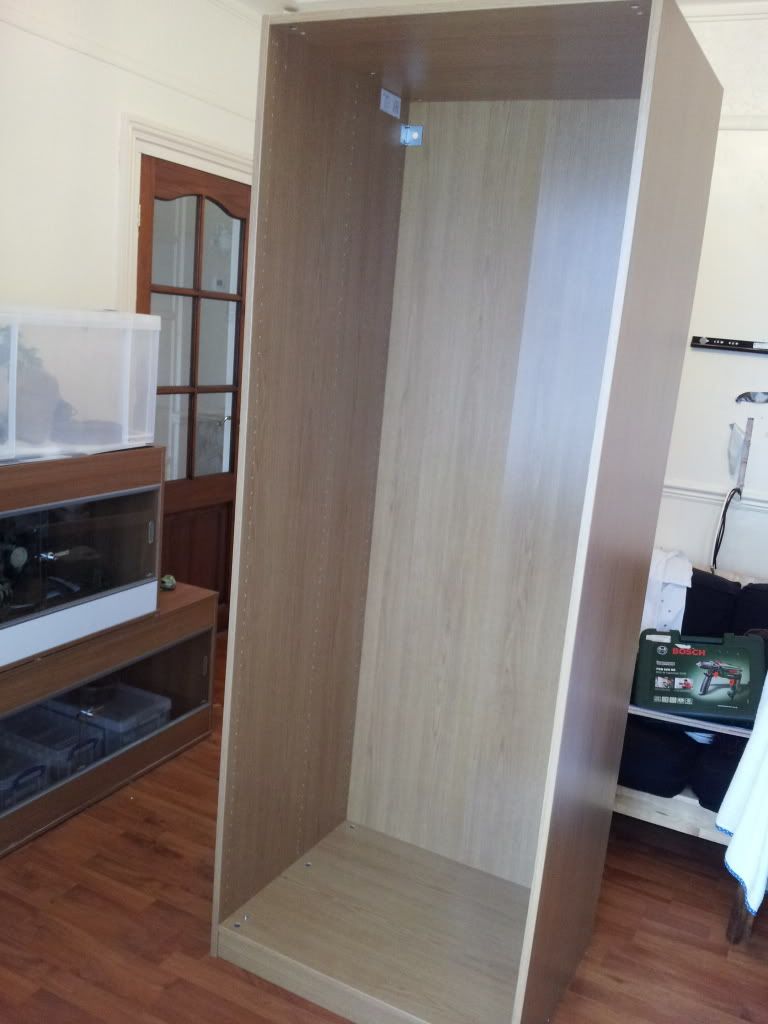
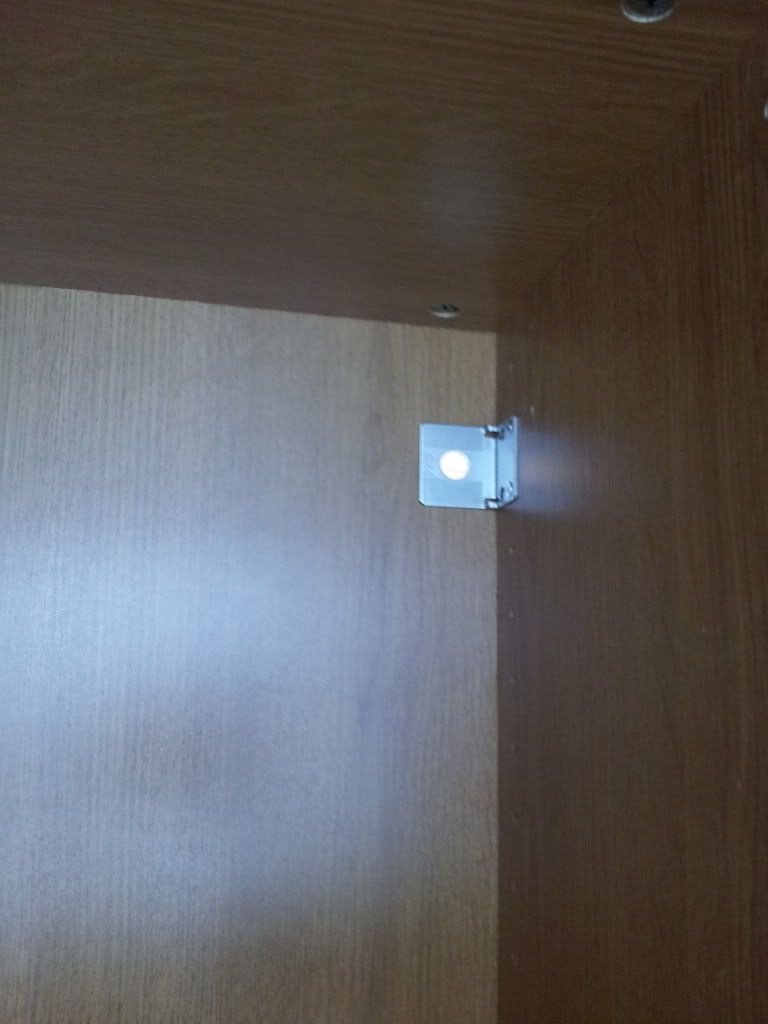
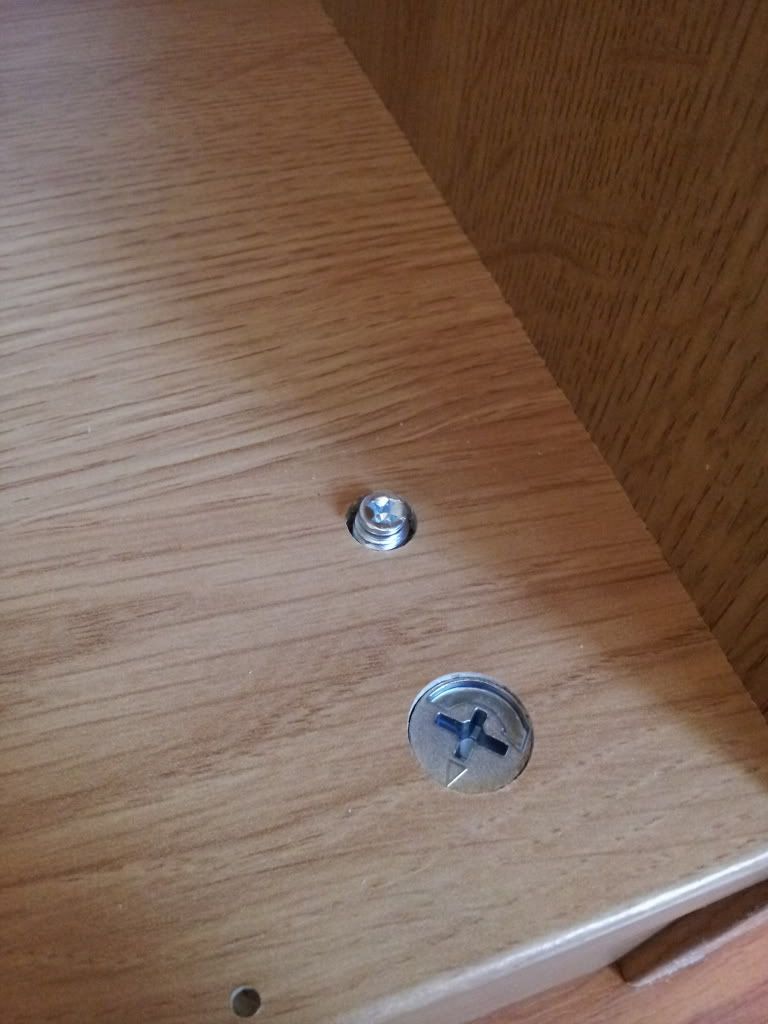
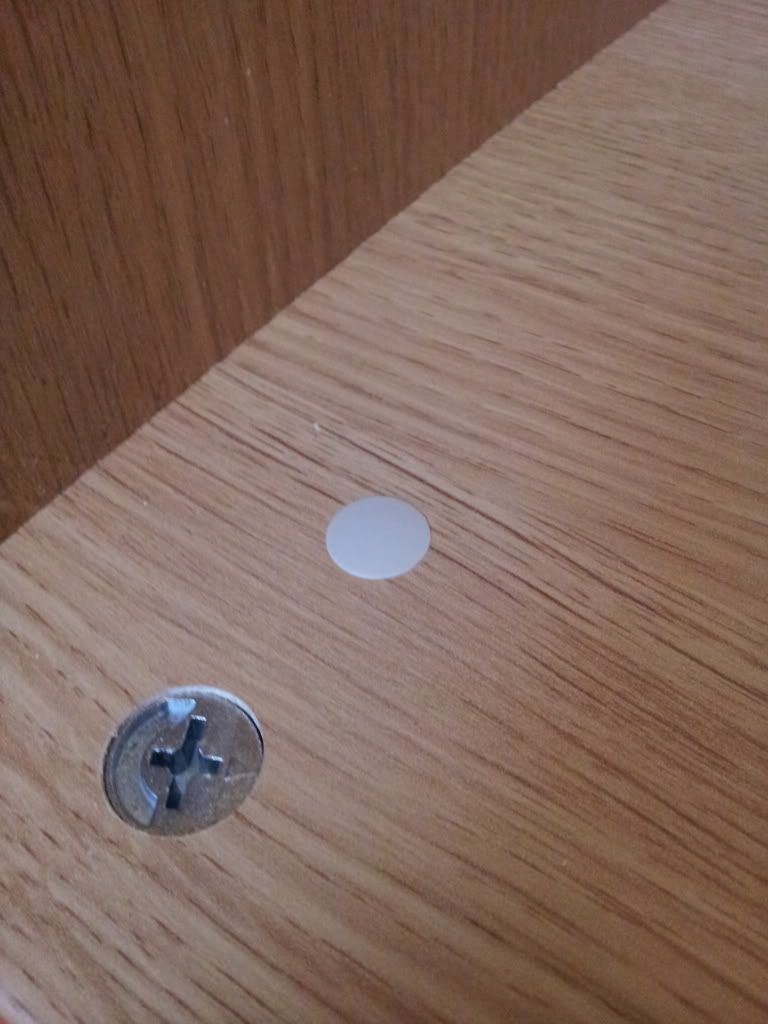
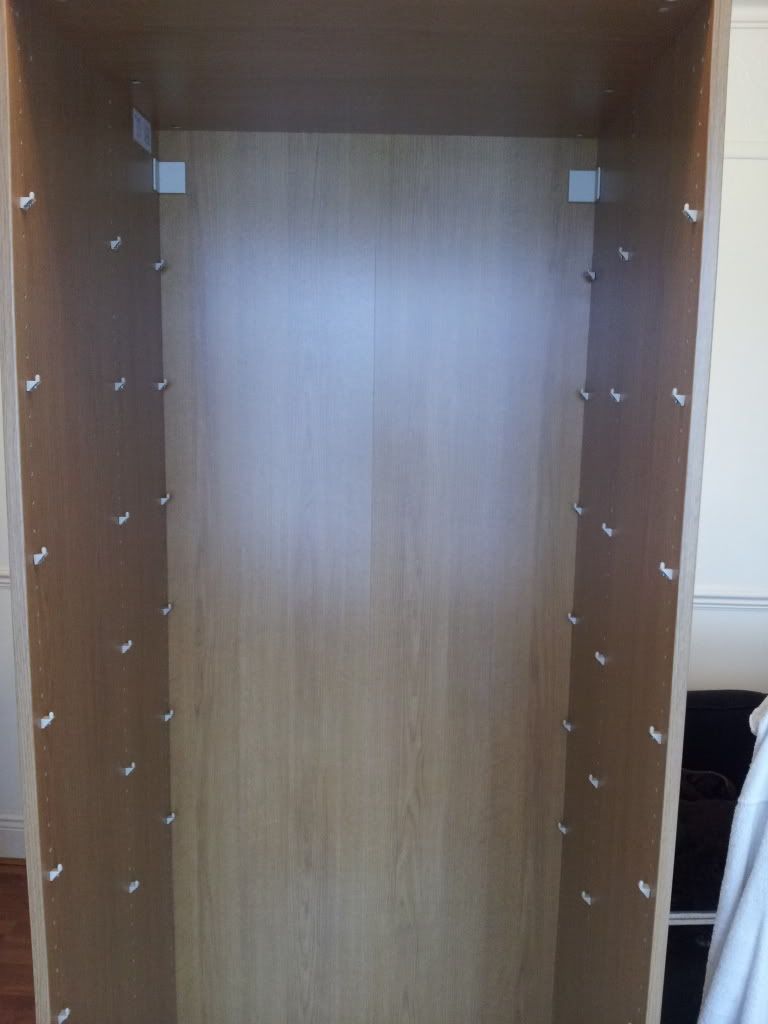
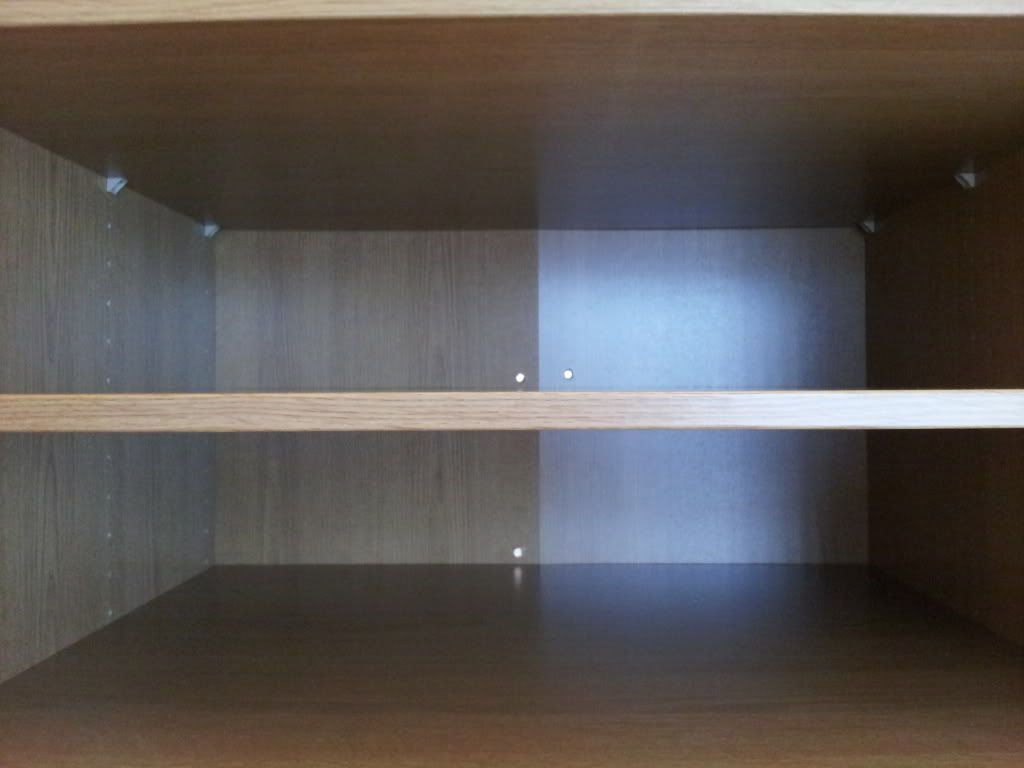
stand the frame up ready to fit the shelves and fit the plastic covers and shelf fixtures
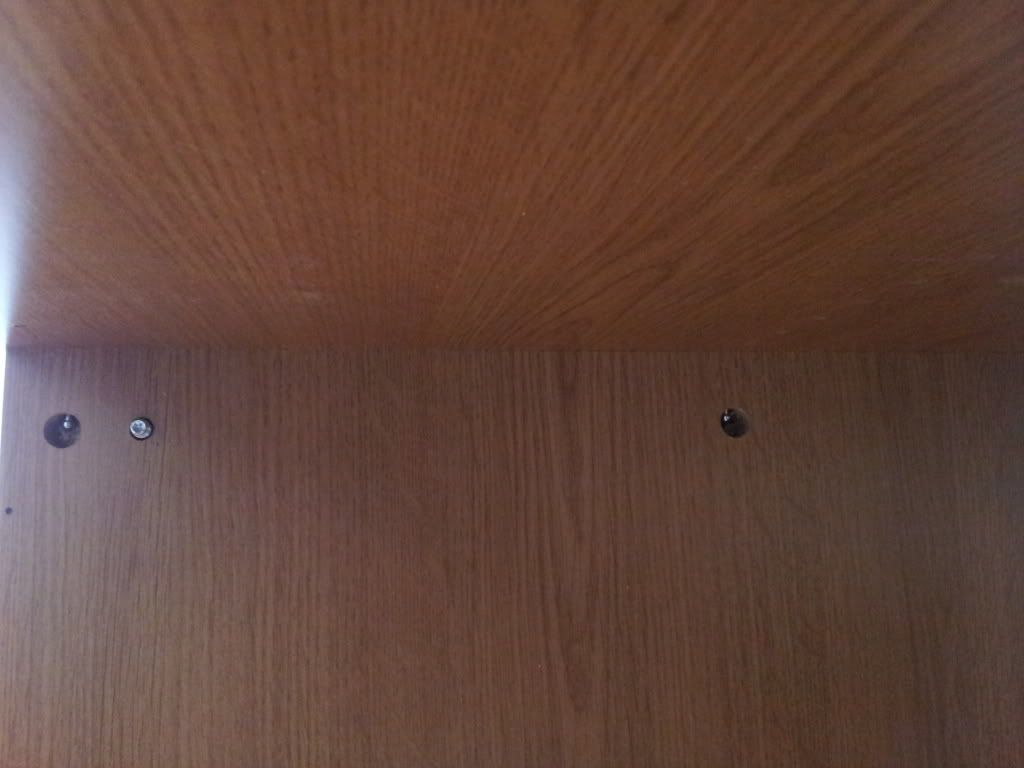
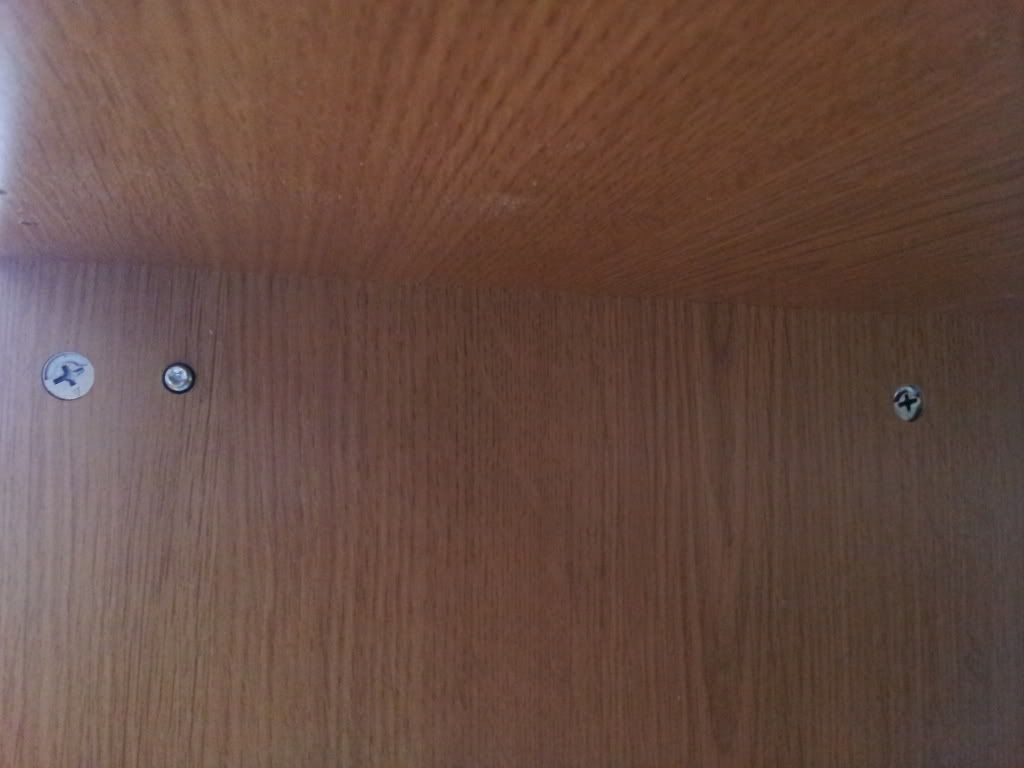
these holes are there for fixing unit to a wall but id imagine nobody would do that as cables and stuff are better and more tidy coming out the back so i just fitted the plastic covers
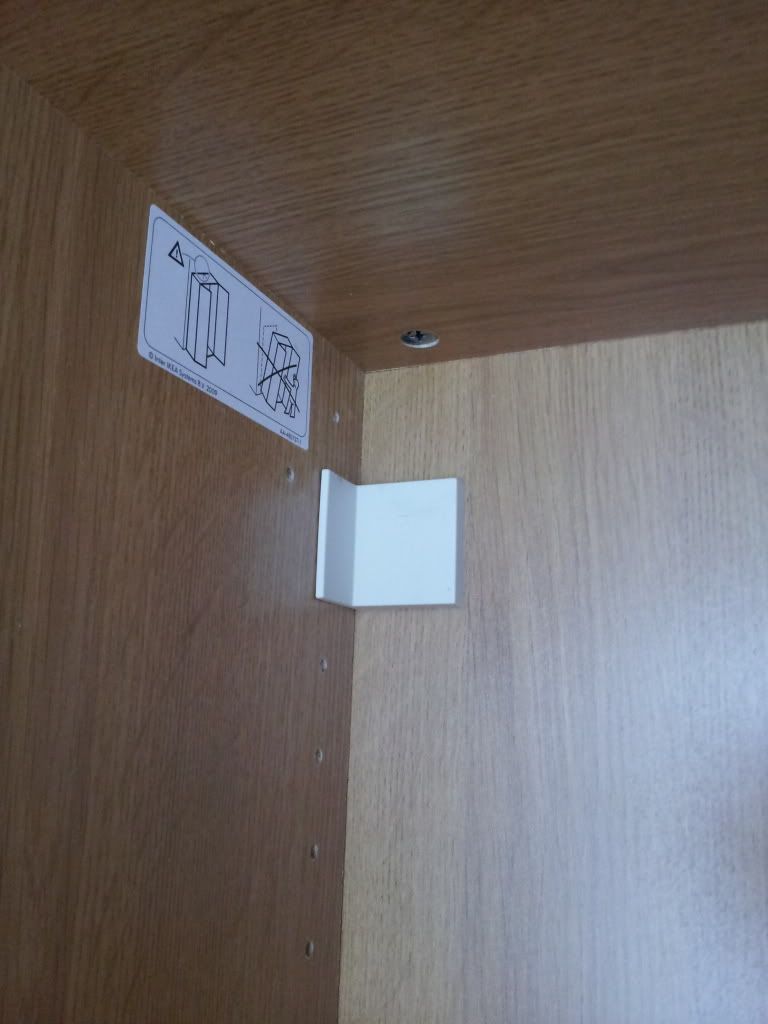
little covers for unused holes in top and to hide screws for levelling
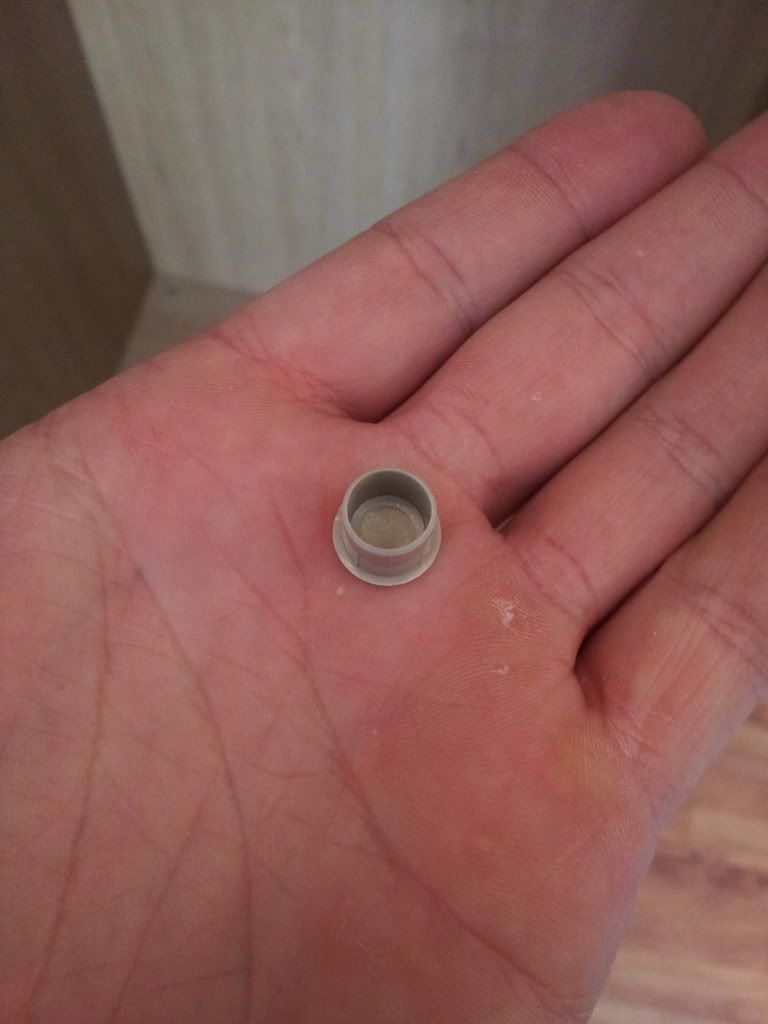
Bits left over for fixing to wall and joining 2 units together which Im not doing
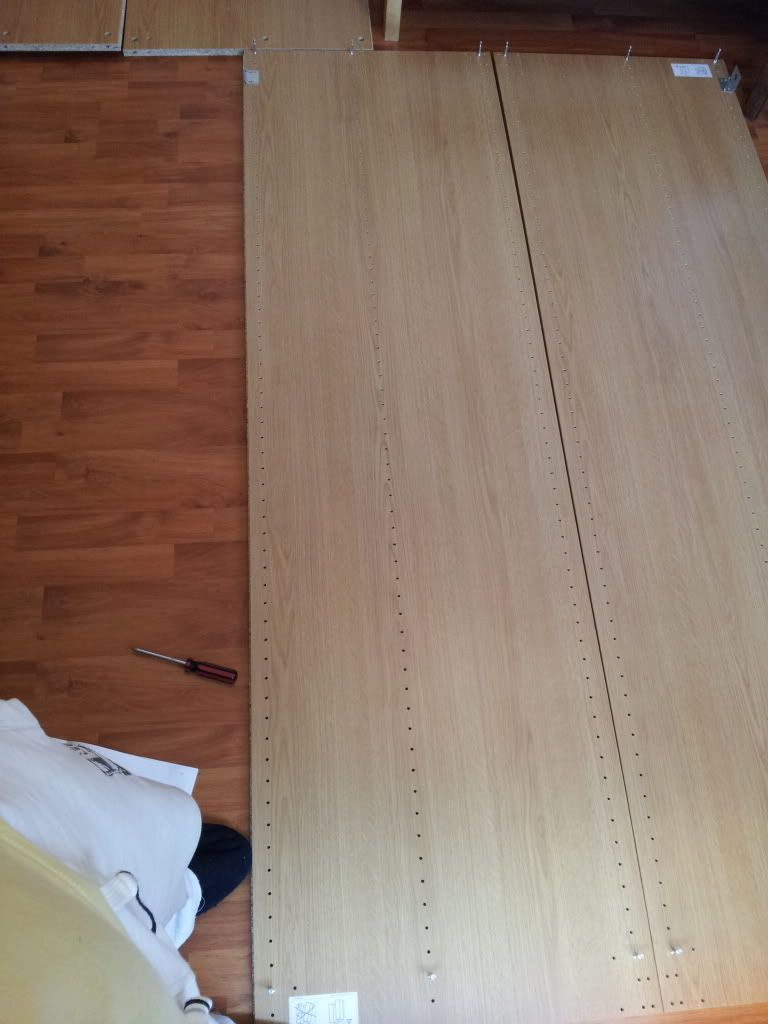
for shelf fittings i counted from top 5 holes then place a fitting in the 6th and then 5 more after that then another in the 6th so when your done you should have 5 holes between every shelf
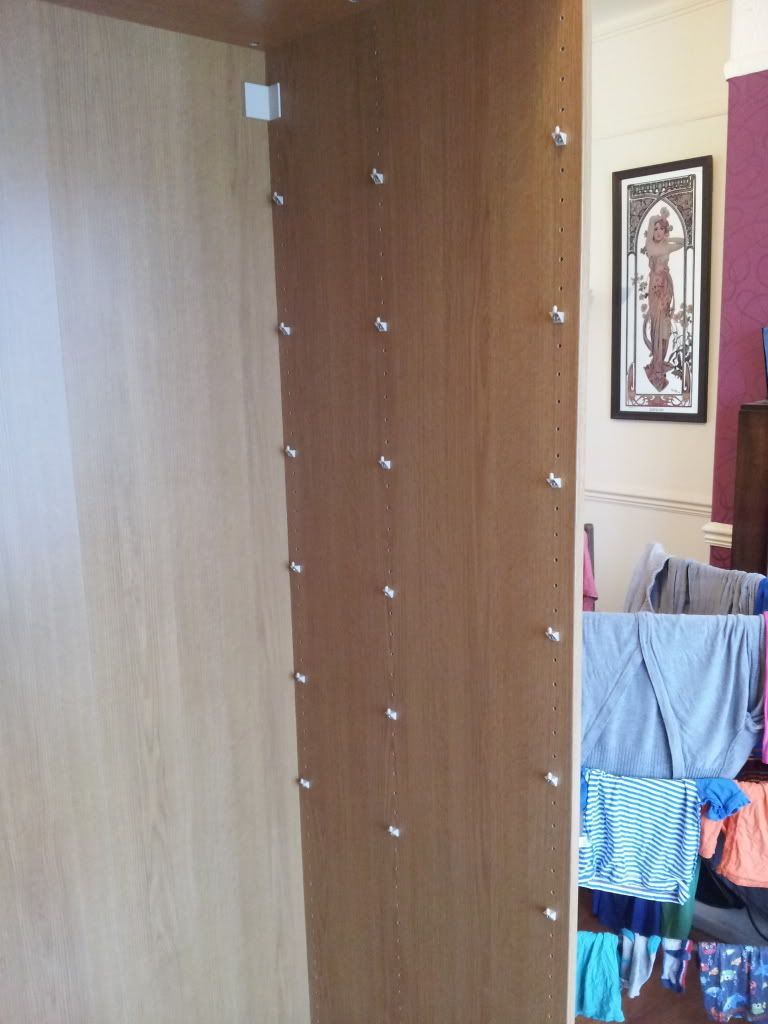
Eagle eyed members might have noticed that I've got 6 holes before my top shelf and not 5 oops lol
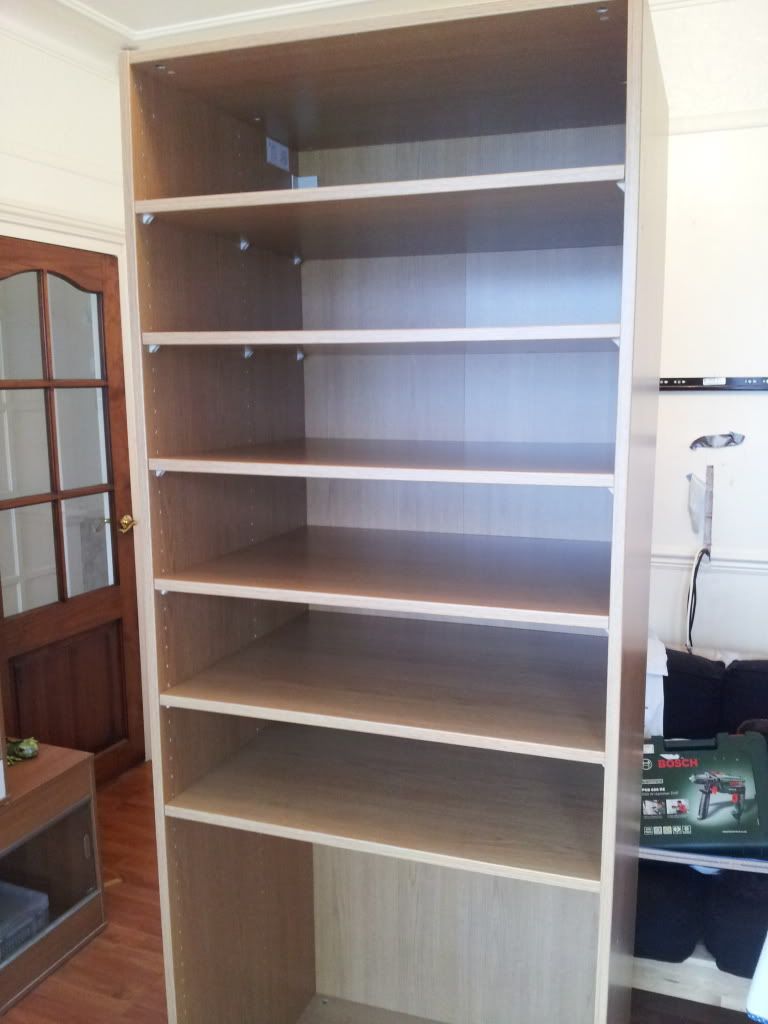
but this won't matter to me as Im only putting 6 shelves in and the bottom is being used for my incubator
but if your wanting to fit the 9 shelves in it must be 5 clear holes then a shelf(for 12l & 33l rubs) i didn't screw the fittings in until i had a shelf in place so i could square them up before screwing in, i did this 1 shelf at a time starting at top to give me room rather than have all shelves in place and have to squeeze in to reach the back ones
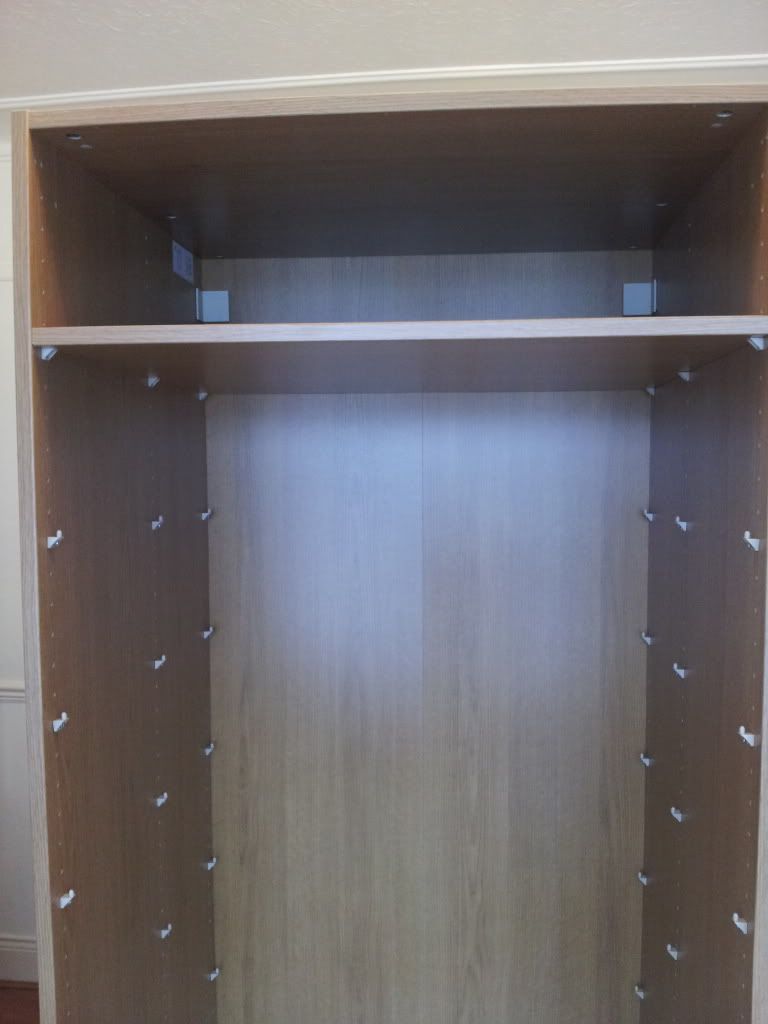
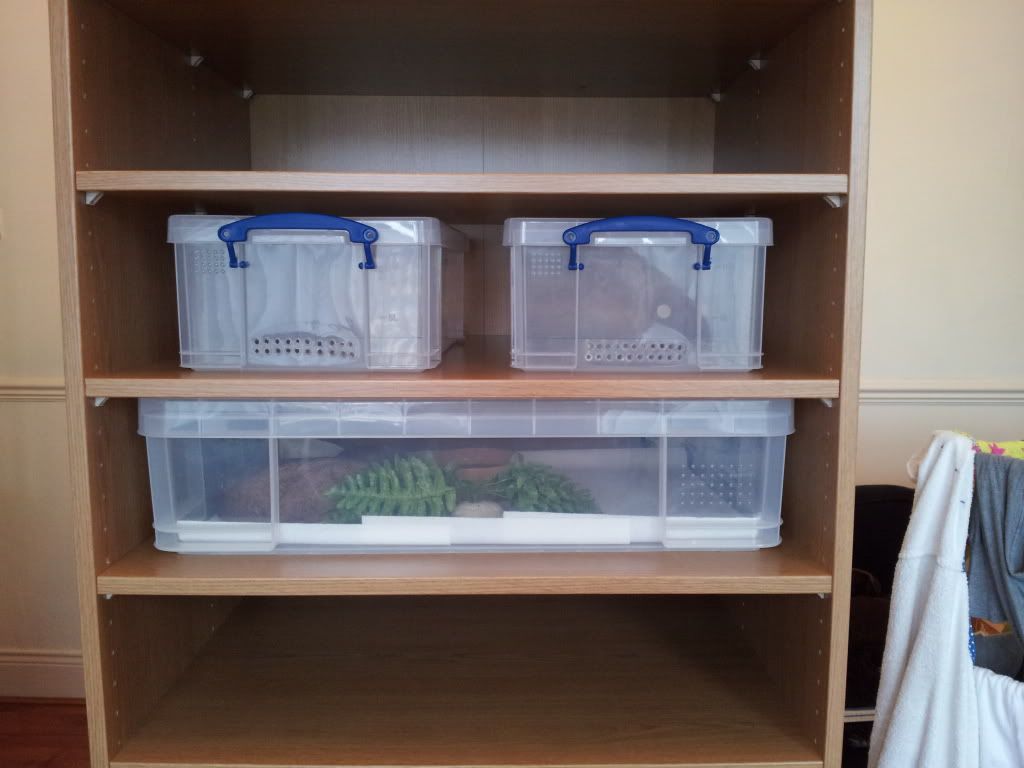
12l rubs in place to check fitting
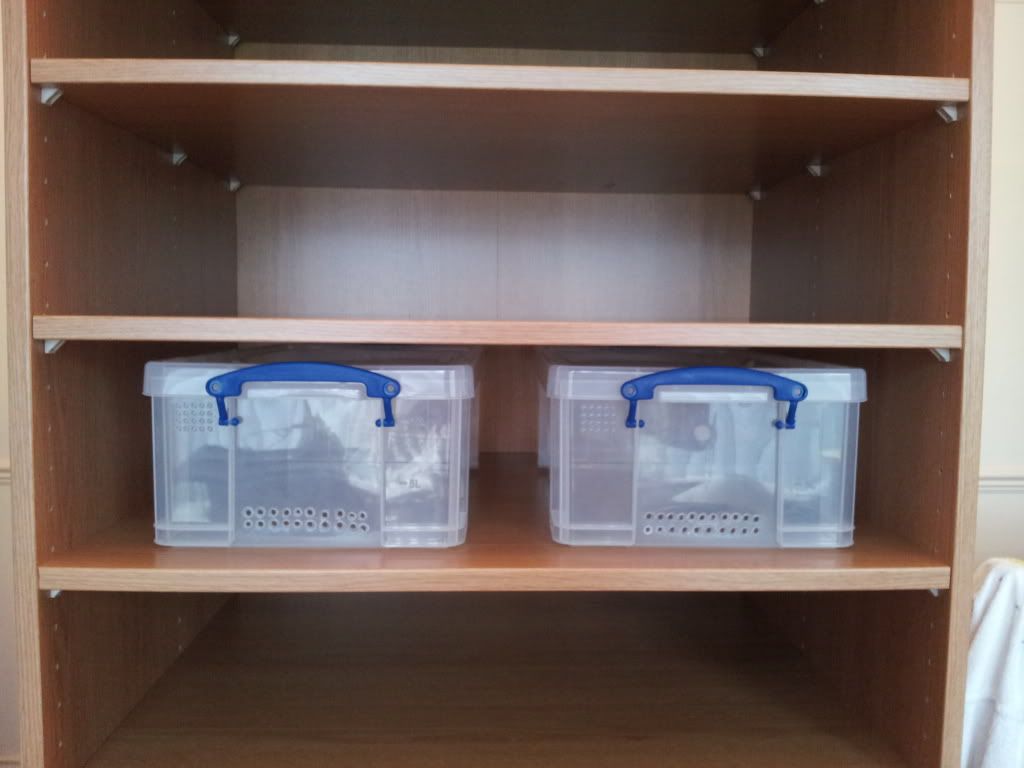
and a 33l rub just fits due to handles but id say the handles could be removed as the shelf above would stop snake lifting lid far enough to get out
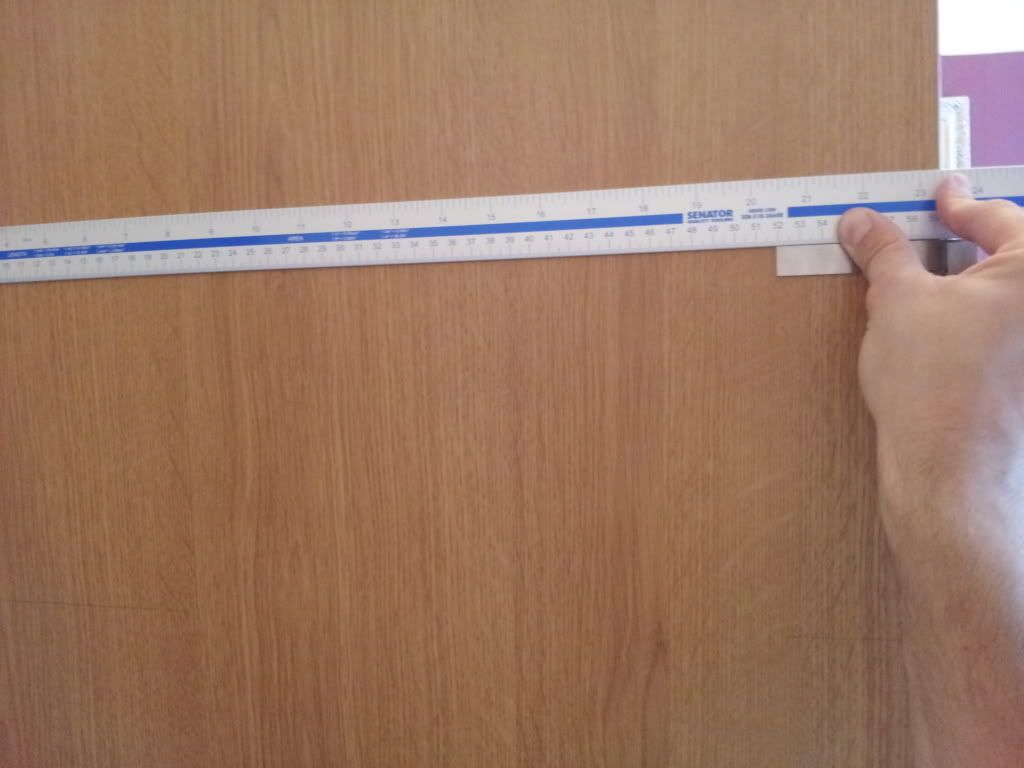
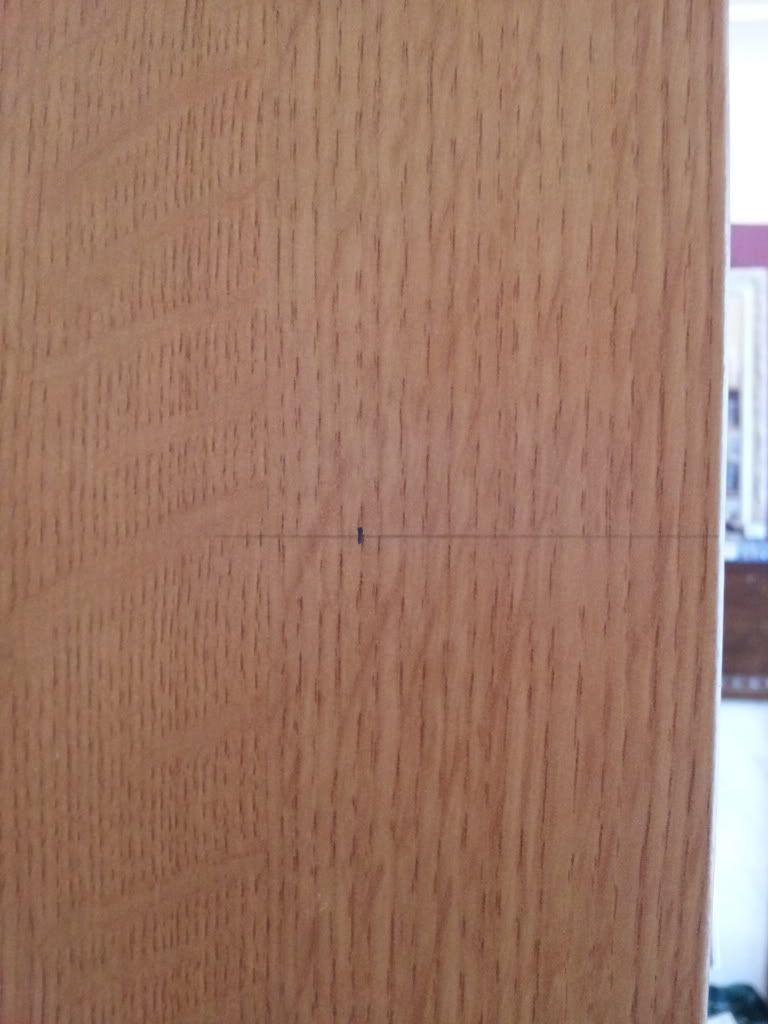
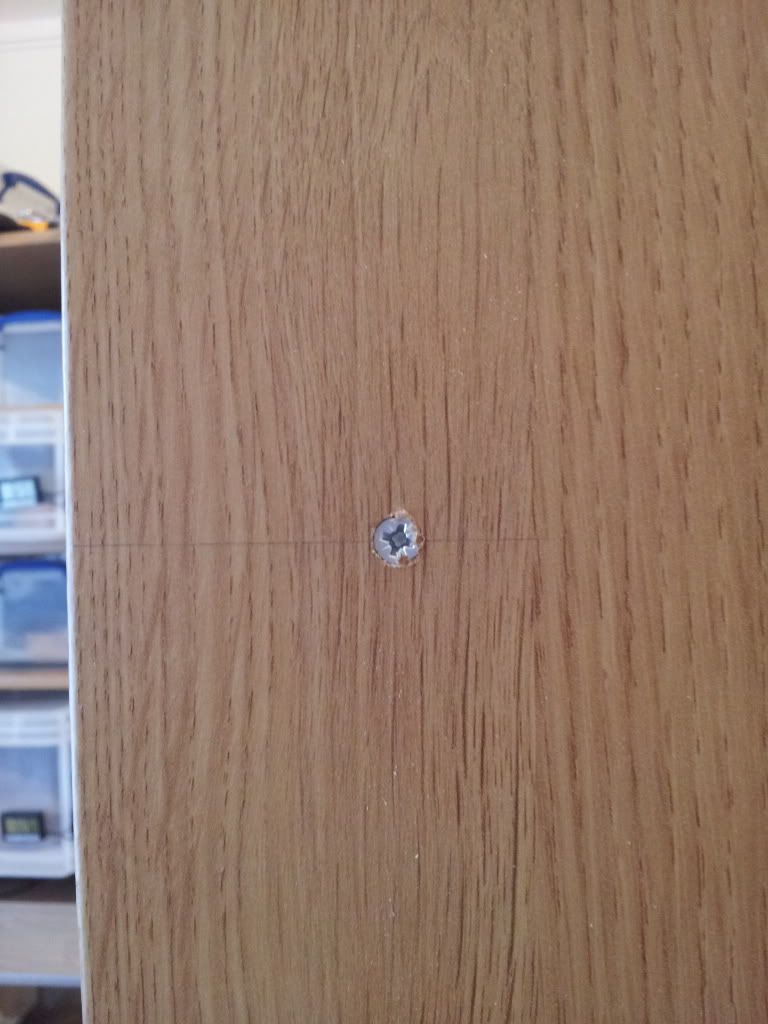
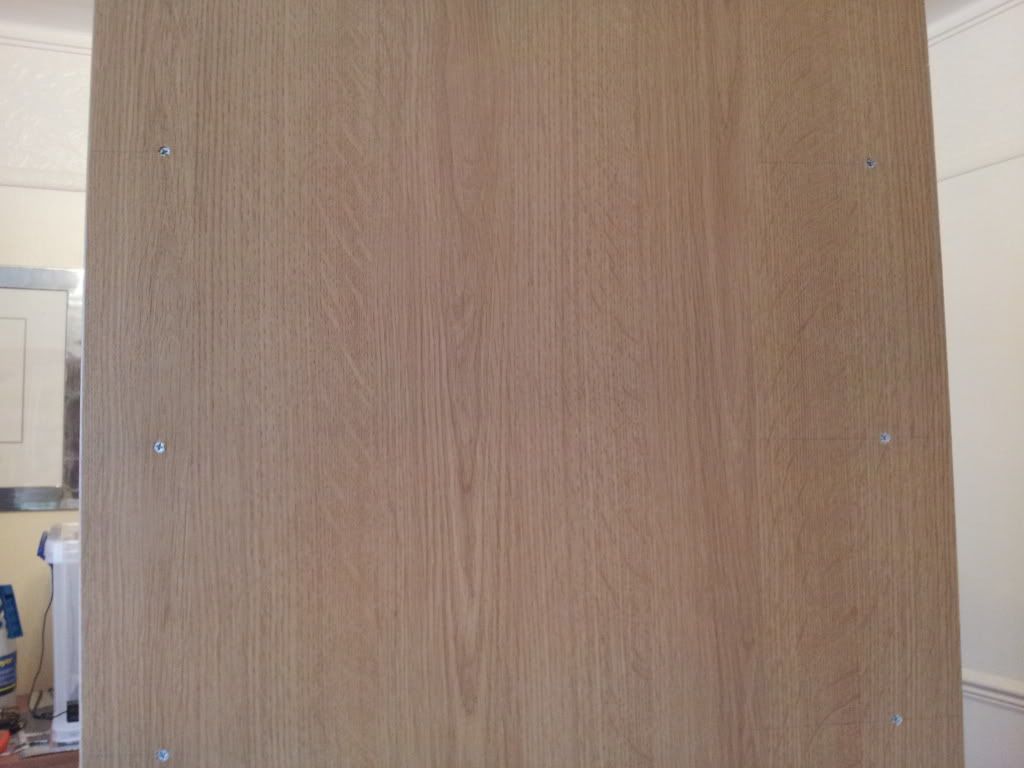
Right now for marking up for additional screws for a bit more strength in the shelves, i used my square to mark front roughly in the middle of shelves then used square to extend it back onto sides. i also used a 1 meter rule against the square to extend it towards the back which was fiddly so you could just measure the marks from top with rule or tape measure if you wanted
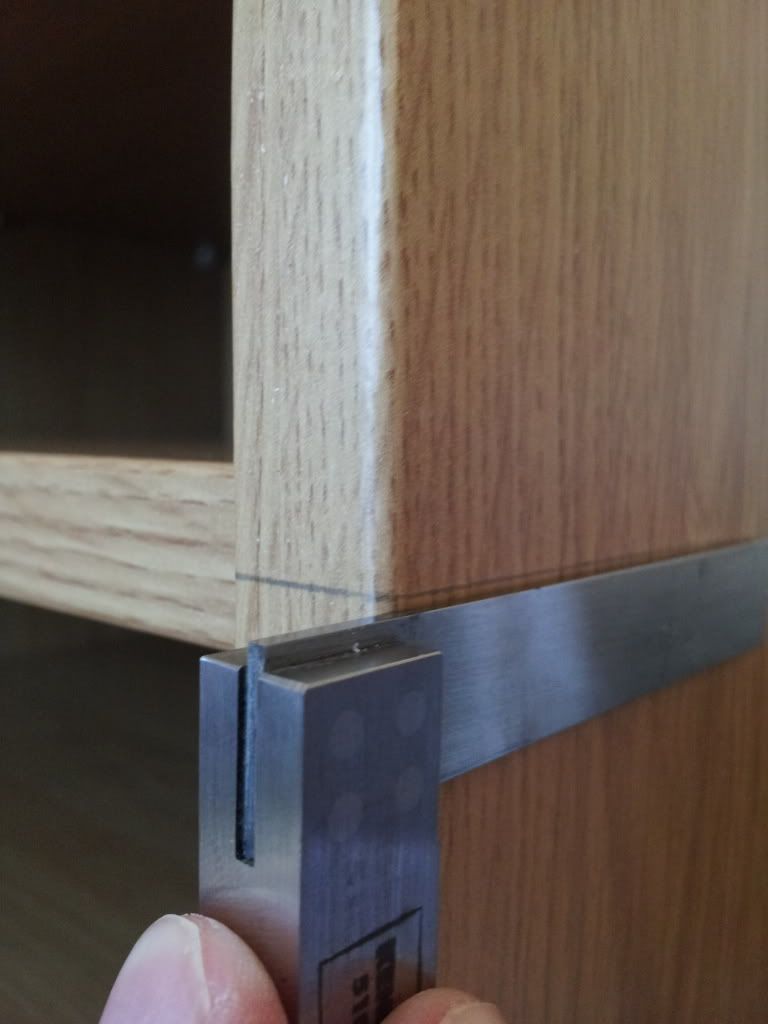
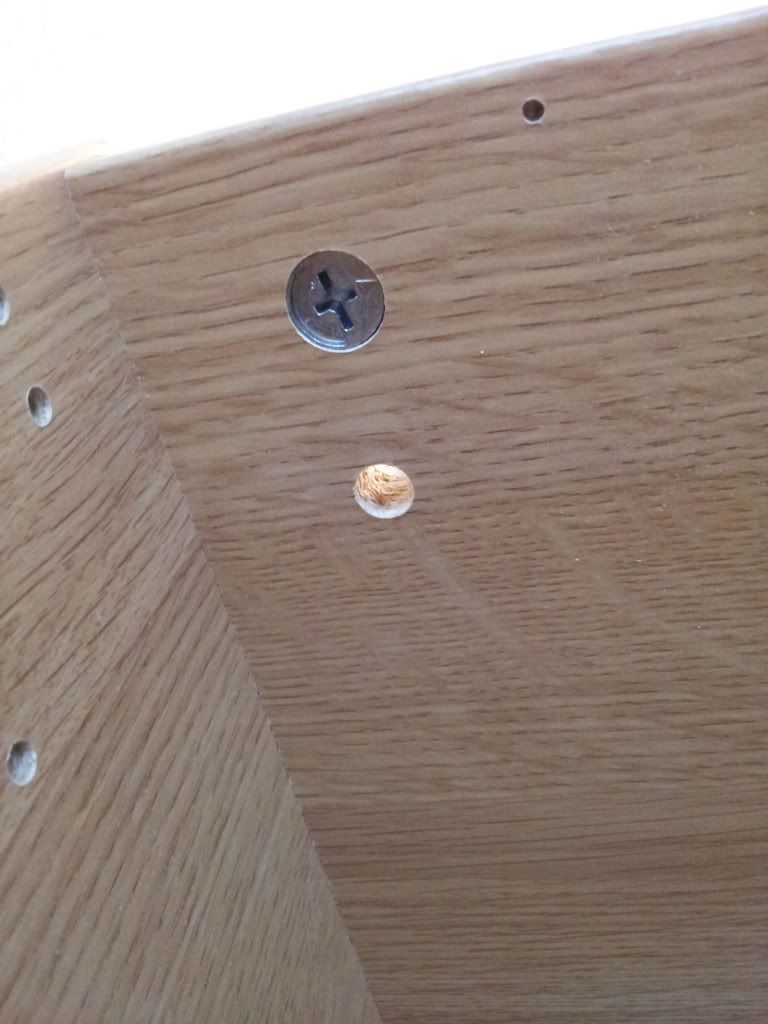
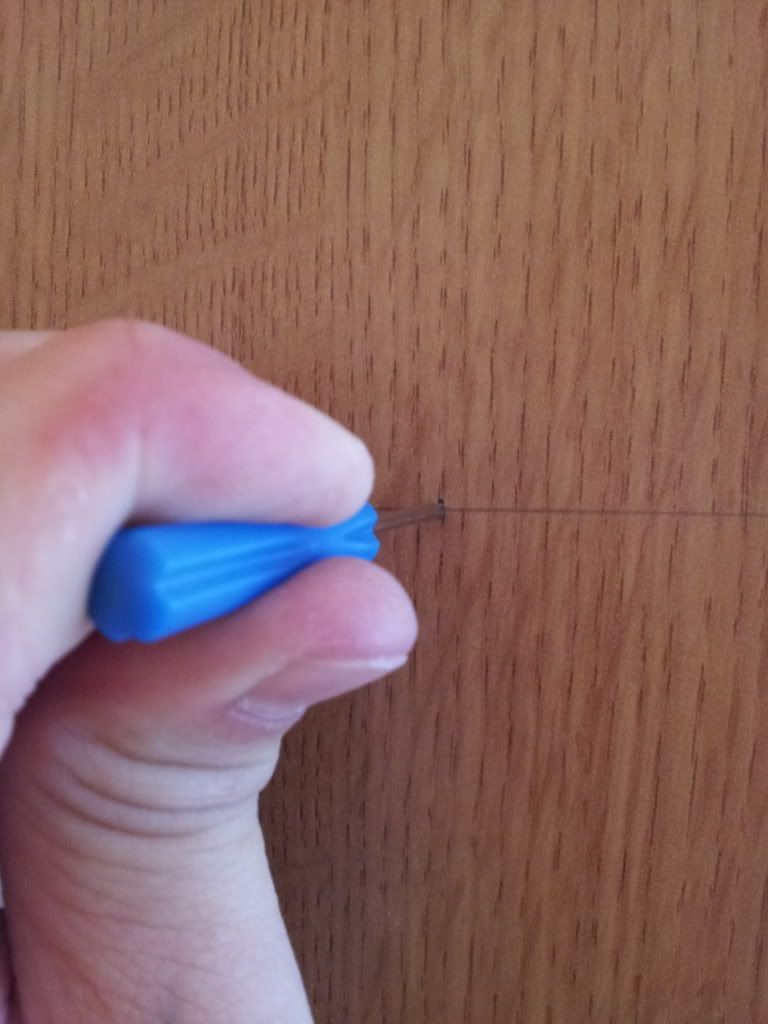
I then measured 50mm from front and back and marked for screw position then used my small watch screwdriver to make a little hole to stop drill wandering
http://i1067.photobucket.com/
|
3.3.0 Royals,Yellow Belly -Marty,Fire YB-Fred,Mojave-Mo,Butter Pinstripe-Betty,Pewter-Newt,Normal-Molly
0.1.0 Snow Cornsnake- Lumi
1.1.0 Hypo Sonoran Dwarf Boa-Bart and Maggie
0.1.0 Albino Pine Snake-Ruby
1.0.0 Bredli Python-Brian
1.0.0 Western Hognose-Hal
1.0.0 Kayuadi Retic-Kaa
0.1.0 Honduran Milksnake-Jubbly
1.1.0 Salmon Boas-Hershey and Sam
0.2.0 Leopard Geckos-Spot and Chocolate
1.4.0 Dune Geckos
0.1.0 Beardie-Cookie
0.3.7 Tarantulas
0.0.1 Pandinus Imperator/emperor scorpion
|
Edited by - carlb1981 on 11/09/2013 19:57:44 |
|
|
PythonManDan
Yearling
United Kingdom
150 Posts |
Posted - 11/09/2013 : 18:51:14
|
| Nice thread, I've been waiting for ages for someone to put some proper pics of a pax wardrobe rack build. All the pics you find on the web are the complete finished racks full of RUBs already. Nice one mate and good work! |
4.0.0 Normal, Pastel, Champagne & Albino Super Pastel Royal Pythons
0.3.0 Pastel, Spider & Albino Spider Royal Pythons
1.0.0 Irian Jaya Carpet Python
0.1.0 Diamond Jungle Jaguar Carpet Python
1.0.0 Diamond Python
2.4.0 Leopard Geckos |
 |
|
|
carlb1981
Fully Grown Royal
United Kingdom
1527 Posts |
Posted - 11/09/2013 : 18:58:42
|
| Adding a bit at a time to make sure Im not doubling up on photos lol |
3.3.0 Royals,Yellow Belly -Marty,Fire YB-Fred,Mojave-Mo,Butter Pinstripe-Betty,Pewter-Newt,Normal-Molly
0.1.0 Snow Cornsnake- Lumi
1.1.0 Hypo Sonoran Dwarf Boa-Bart and Maggie
0.1.0 Albino Pine Snake-Ruby
1.0.0 Bredli Python-Brian
1.0.0 Western Hognose-Hal
1.0.0 Kayuadi Retic-Kaa
0.1.0 Honduran Milksnake-Jubbly
1.1.0 Salmon Boas-Hershey and Sam
0.2.0 Leopard Geckos-Spot and Chocolate
1.4.0 Dune Geckos
0.1.0 Beardie-Cookie
0.3.7 Tarantulas
0.0.1 Pandinus Imperator/emperor scorpion
|
|
|
|
carlb1981
Fully Grown Royal
United Kingdom
1527 Posts |
Posted - 11/09/2013 : 20:04:42
|
Hit max for post so continuing on lol
pic of little hole to start drilling

Then drill holes using a 3mm drill bit and drill so you just break through side panel and drill about 5mm into shelf for a guide for the screws
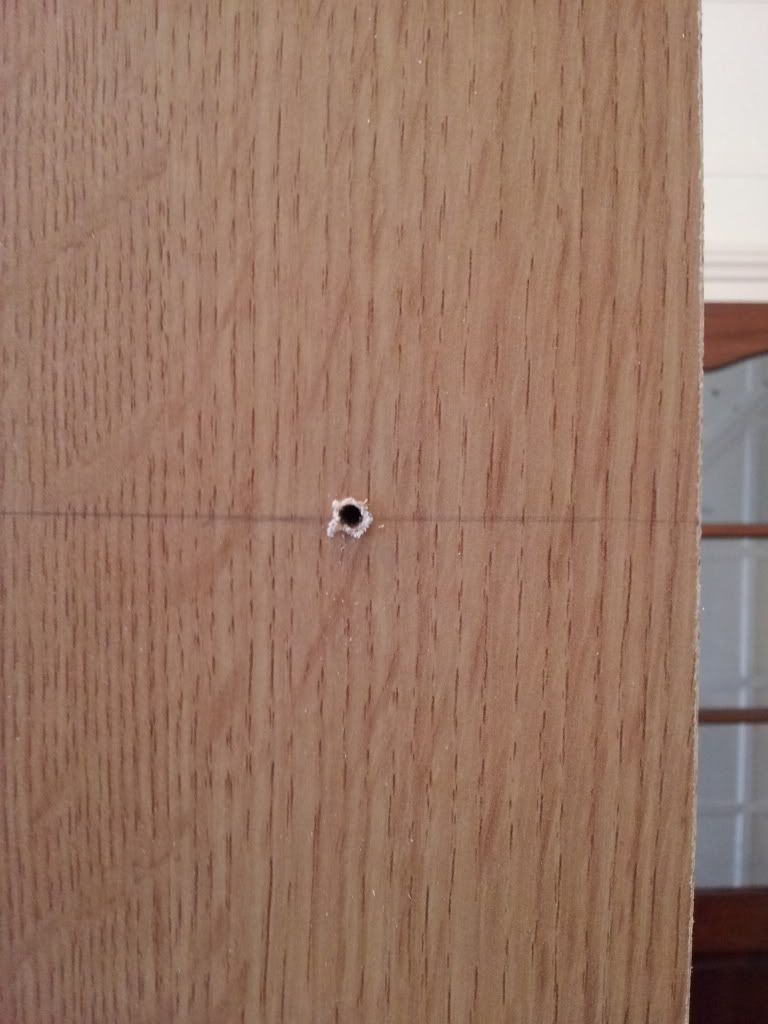
i used my little posi drive drill bit to screw in the screws so the screw head bites into side panel just below surface
Then using the 9mm drill bit drill holes into the back panel ready for heat mat cables to pass through and an extra one in the back on shelves where your fitting your thermostat probe
 |
3.3.0 Royals,Yellow Belly -Marty,Fire YB-Fred,Mojave-Mo,Butter Pinstripe-Betty,Pewter-Newt,Normal-Molly
0.1.0 Snow Cornsnake- Lumi
1.1.0 Hypo Sonoran Dwarf Boa-Bart and Maggie
0.1.0 Albino Pine Snake-Ruby
1.0.0 Bredli Python-Brian
1.0.0 Western Hognose-Hal
1.0.0 Kayuadi Retic-Kaa
0.1.0 Honduran Milksnake-Jubbly
1.1.0 Salmon Boas-Hershey and Sam
0.2.0 Leopard Geckos-Spot and Chocolate
1.4.0 Dune Geckos
0.1.0 Beardie-Cookie
0.3.7 Tarantulas
0.0.1 Pandinus Imperator/emperor scorpion
|
|
|
|
carlb1981
Fully Grown Royal
United Kingdom
1527 Posts |
Posted - 11/09/2013 : 20:06:33
|
| That's it for now just the heating to add so will update when i get that done :-) |
3.3.0 Royals,Yellow Belly -Marty,Fire YB-Fred,Mojave-Mo,Butter Pinstripe-Betty,Pewter-Newt,Normal-Molly
0.1.0 Snow Cornsnake- Lumi
1.1.0 Hypo Sonoran Dwarf Boa-Bart and Maggie
0.1.0 Albino Pine Snake-Ruby
1.0.0 Bredli Python-Brian
1.0.0 Western Hognose-Hal
1.0.0 Kayuadi Retic-Kaa
0.1.0 Honduran Milksnake-Jubbly
1.1.0 Salmon Boas-Hershey and Sam
0.2.0 Leopard Geckos-Spot and Chocolate
1.4.0 Dune Geckos
0.1.0 Beardie-Cookie
0.3.7 Tarantulas
0.0.1 Pandinus Imperator/emperor scorpion
|
|
|
|
Leucistic
Yearling
United Kingdom
453 Posts |
Posted - 12/09/2013 : 08:07:34
|
Great thread mate. Looks great.
One thing I never realised was how heavy the unit is until I had to move it on my own lol. A mistake I made just the once  |
1.0.0 Mojave Royal Python - Loki
0.1.0 Lesser Fire Royal Python - Summer
0.1.0 100% het Albino Royal Python - Nancy
1.0.0 Butter Spider Royal Python - Otis
1.0.0 Albino Royal Python - Hermies
1.0.0 California King Snake - Oreo (Mr Grumpy)
1.0.0 Western Hognose - Tyrion
0.1.0 Amazon Tree Boa - Rose
0.1.0 Horned frog - India
0.0.2 Gargoyle Gecko - Willow & Amber
0.0.1 Leachianus Henkeli- Boo
0.1.0 Staffy x Bulldog - Piggy
Lots of Fish and Shrimp |
|
|
|
carlb1981
Fully Grown Royal
United Kingdom
1527 Posts |
Posted - 19/09/2013 : 21:28:08
|
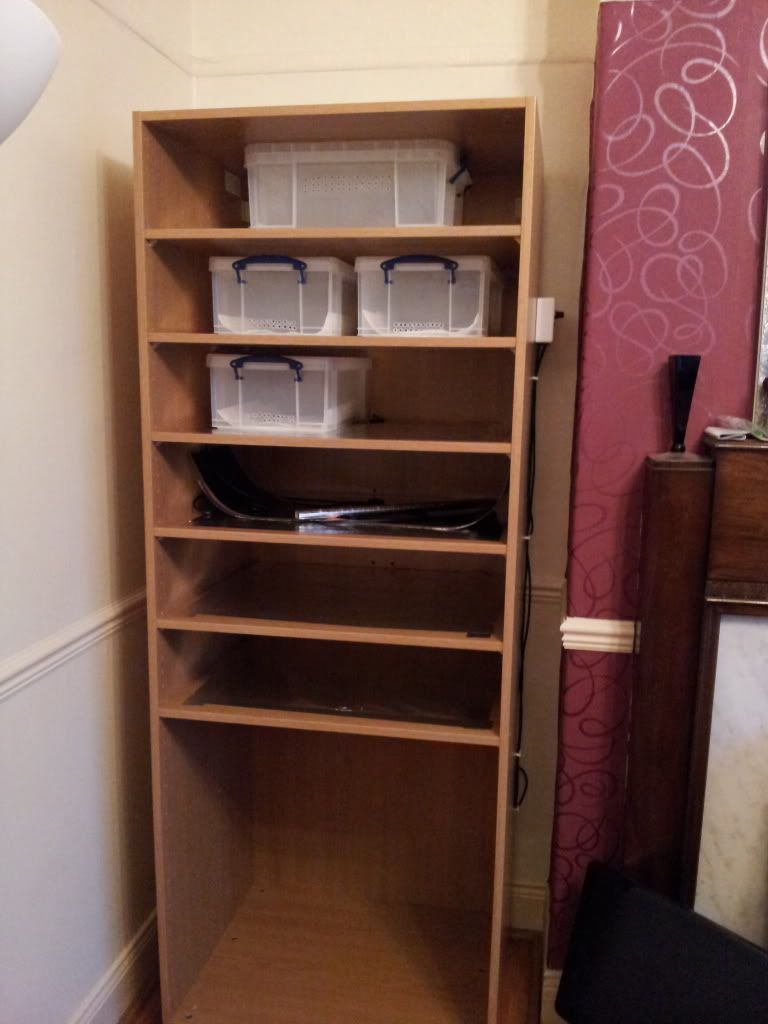
Right a few more bits done today insulated the shelves to direct the heat from the mat up and away from shelves into rubs and fitted mats and stat just need to call to shops tomorrow for an extension lead to plug mats into.
This is the insulation/heat reflection roll and aluminium foil tape i used, bought from homebase
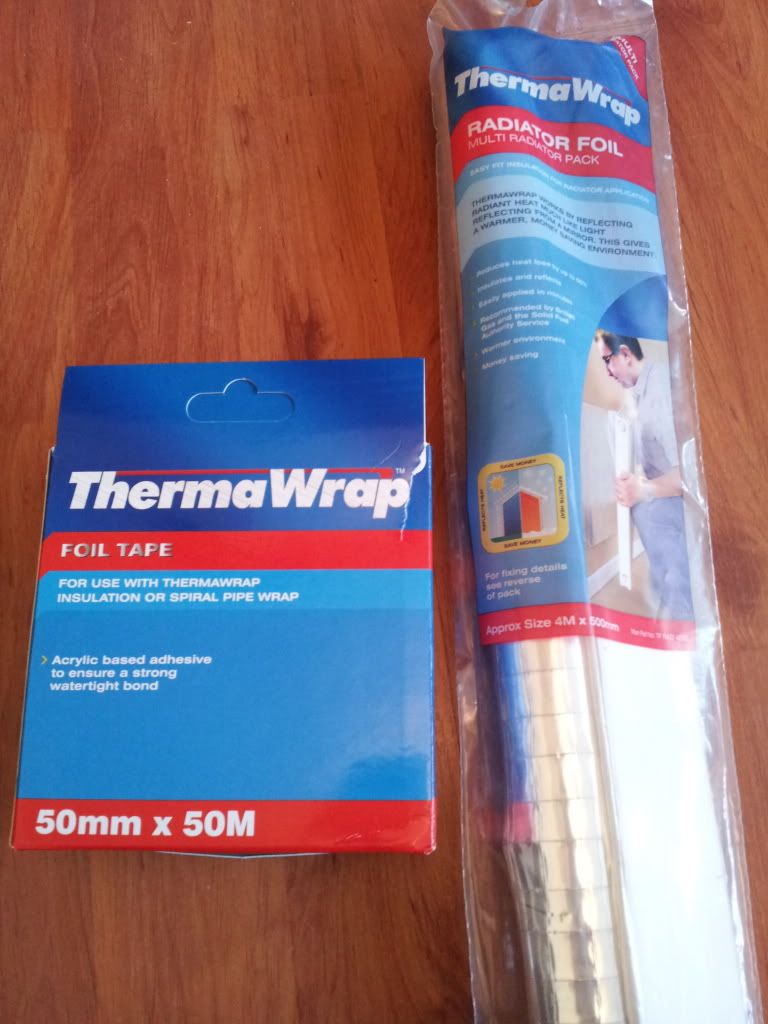
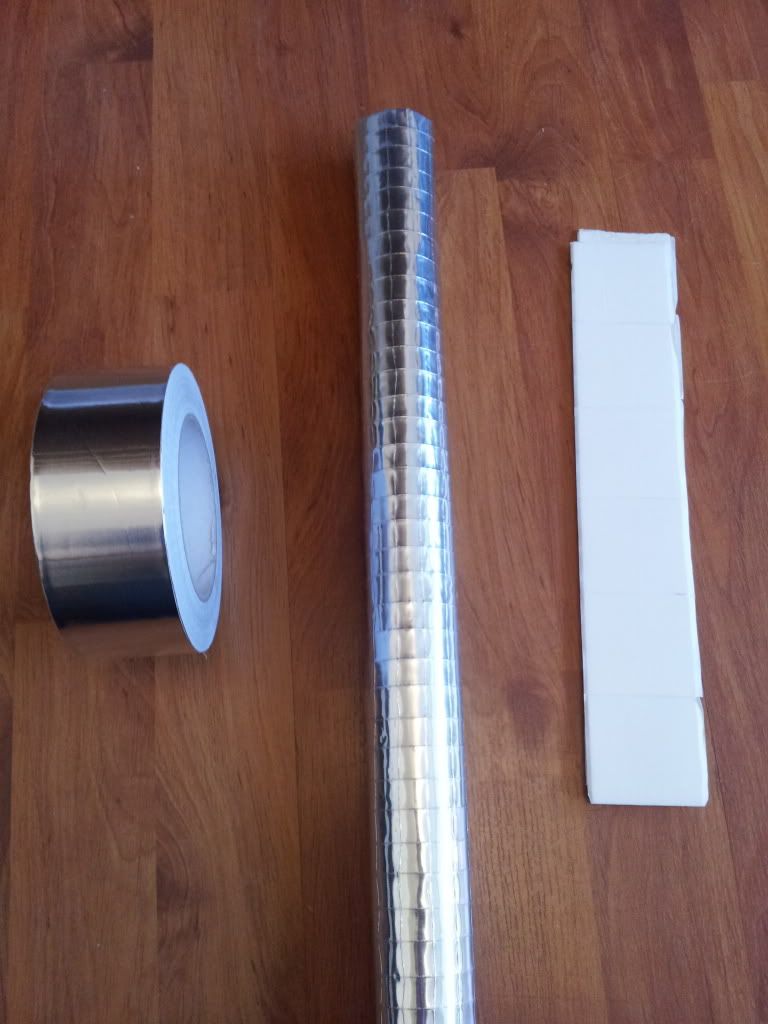
i didn't use the double sided sticky pads that came with the roll of insulation but keep it to one side as it may be used to attach extension lead to rack
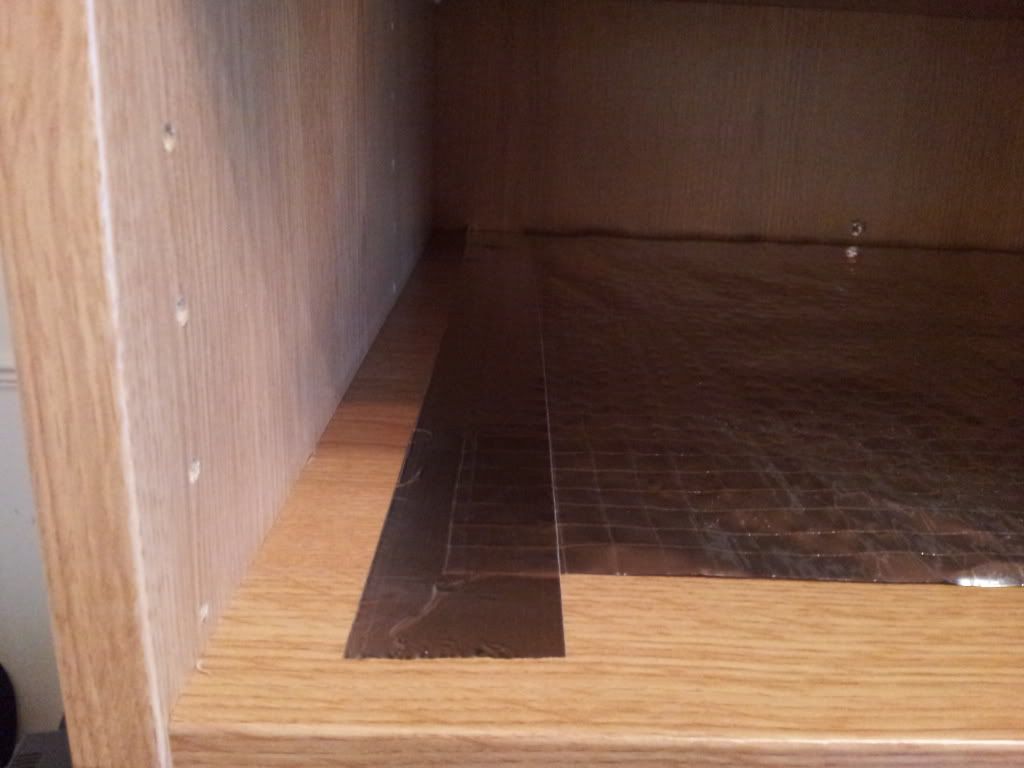
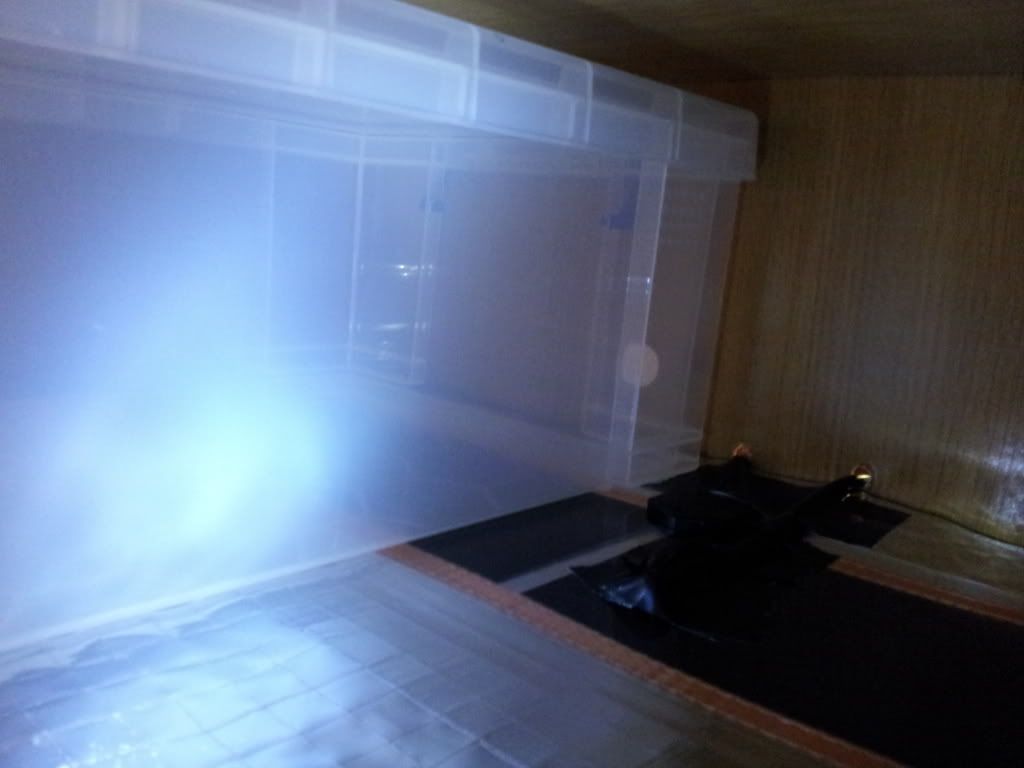
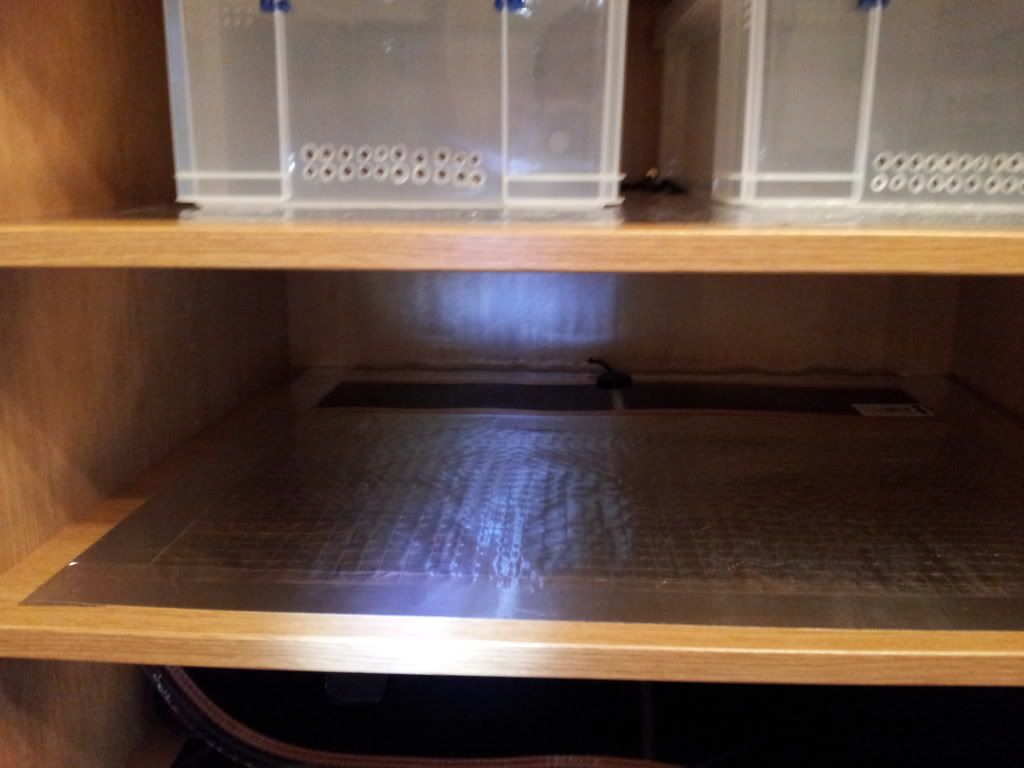
First lay mat out on top of the insulation to cut it to size, i cut it about 3/4" bigger either side of mat for taping it down
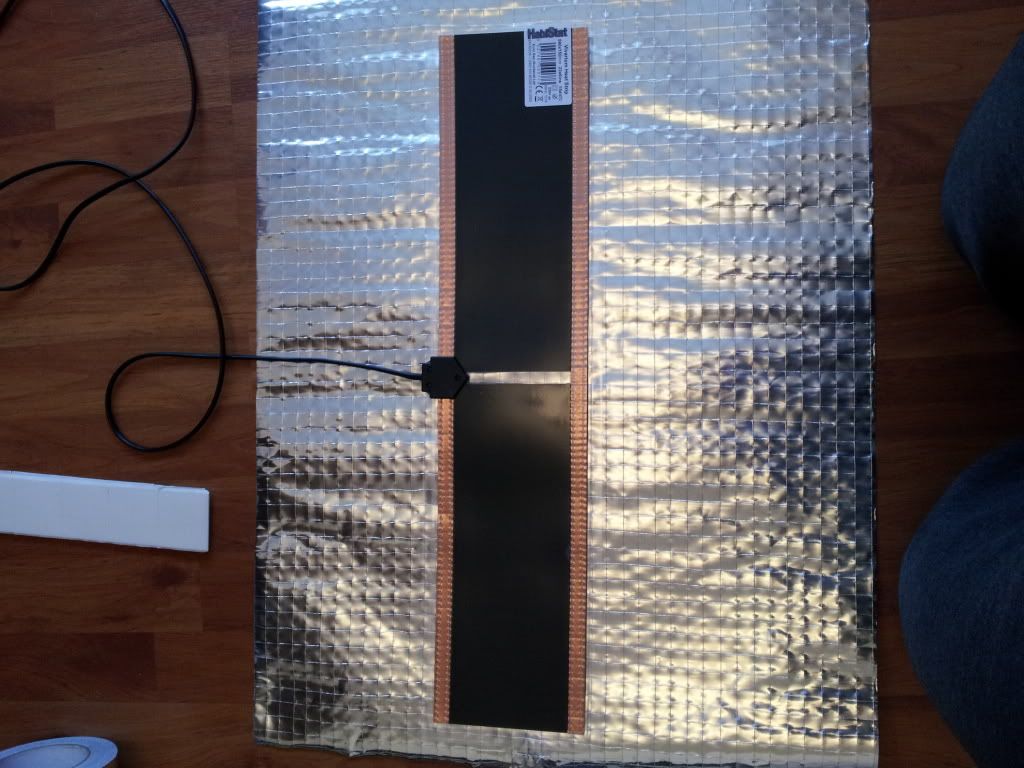
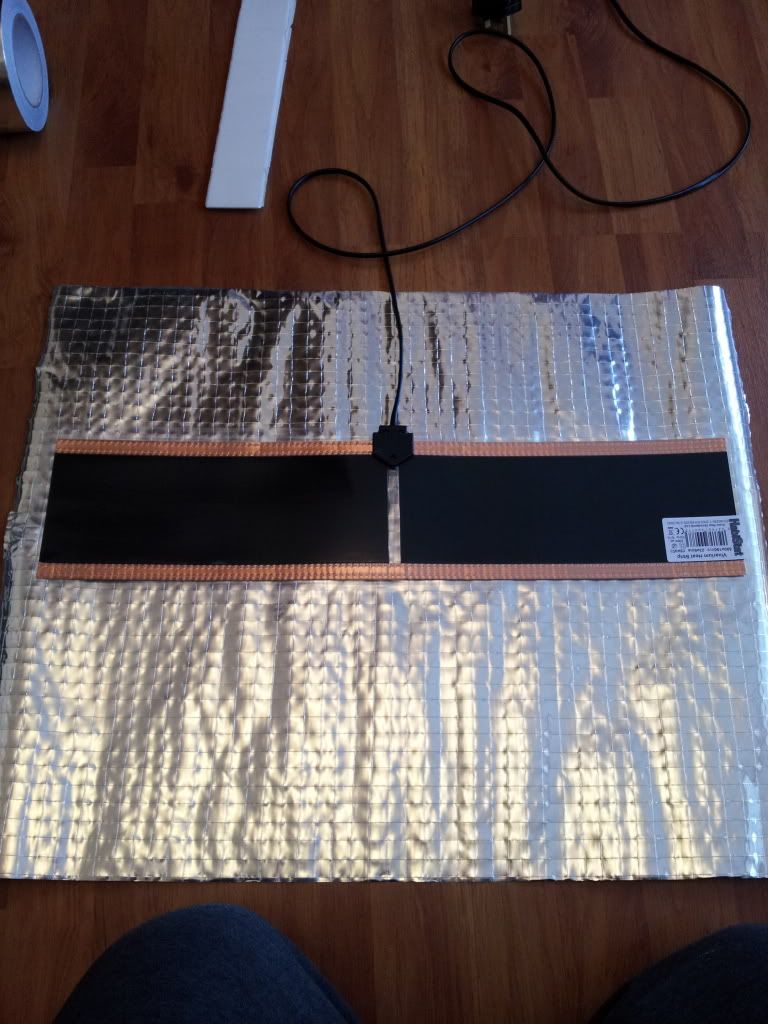
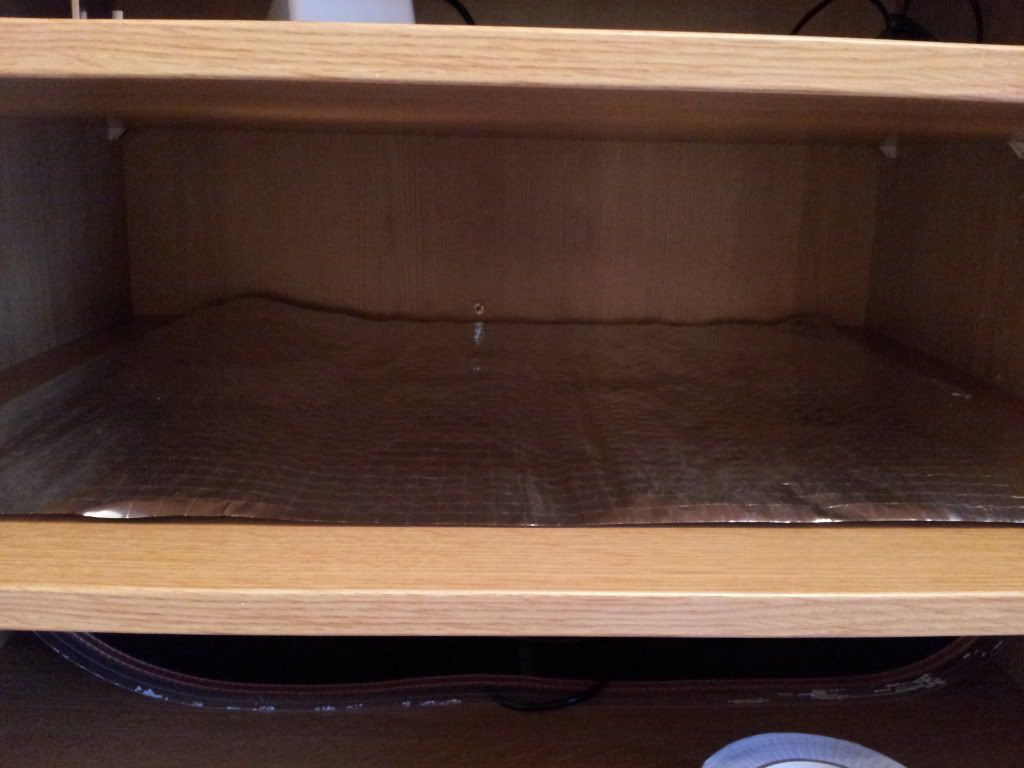
Once cut to size the panel covers most of the shelf place it central and tape it to shelf using the foil tape
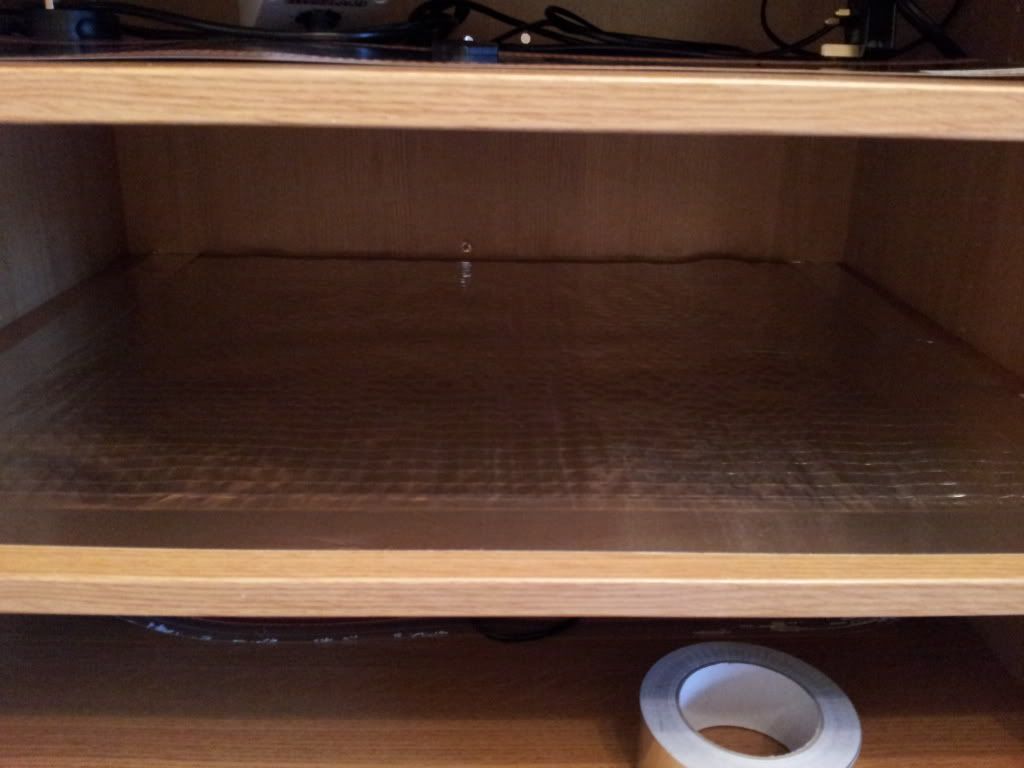
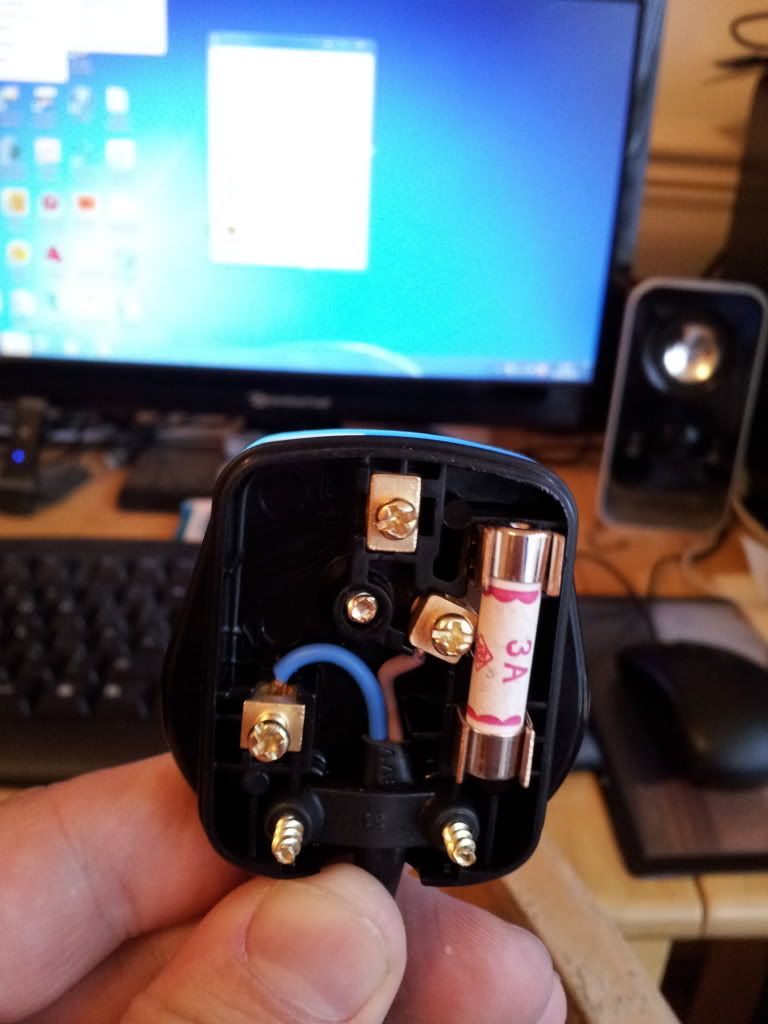
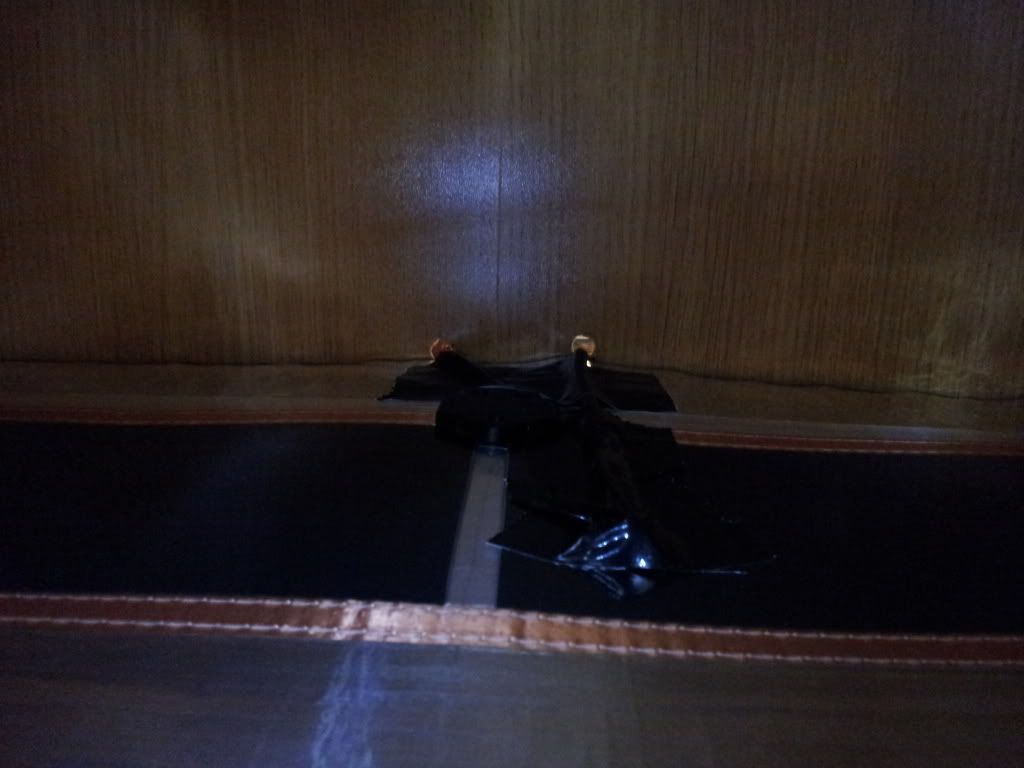
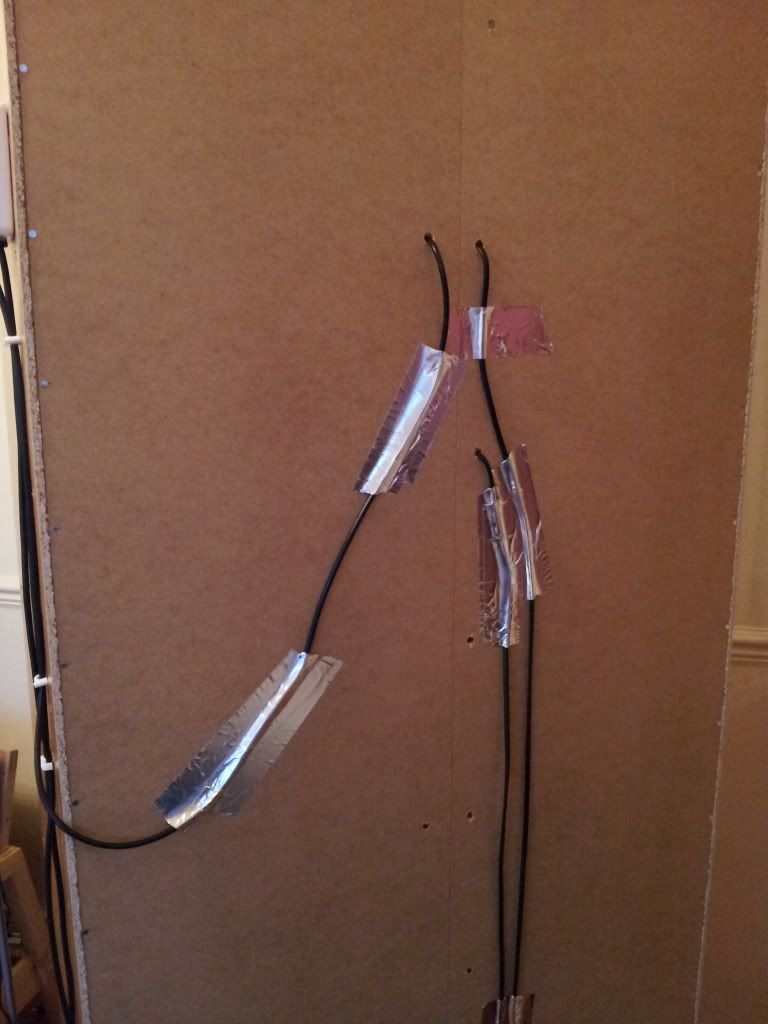
Then remove plug from your mats and thread cable through the drilled holes in the back panel and refit, place mat central and have the back edge about 2" from back of shelf then tape down using foil tape
(photo just to show wiring in case you forget which way they are after removing plug lol)
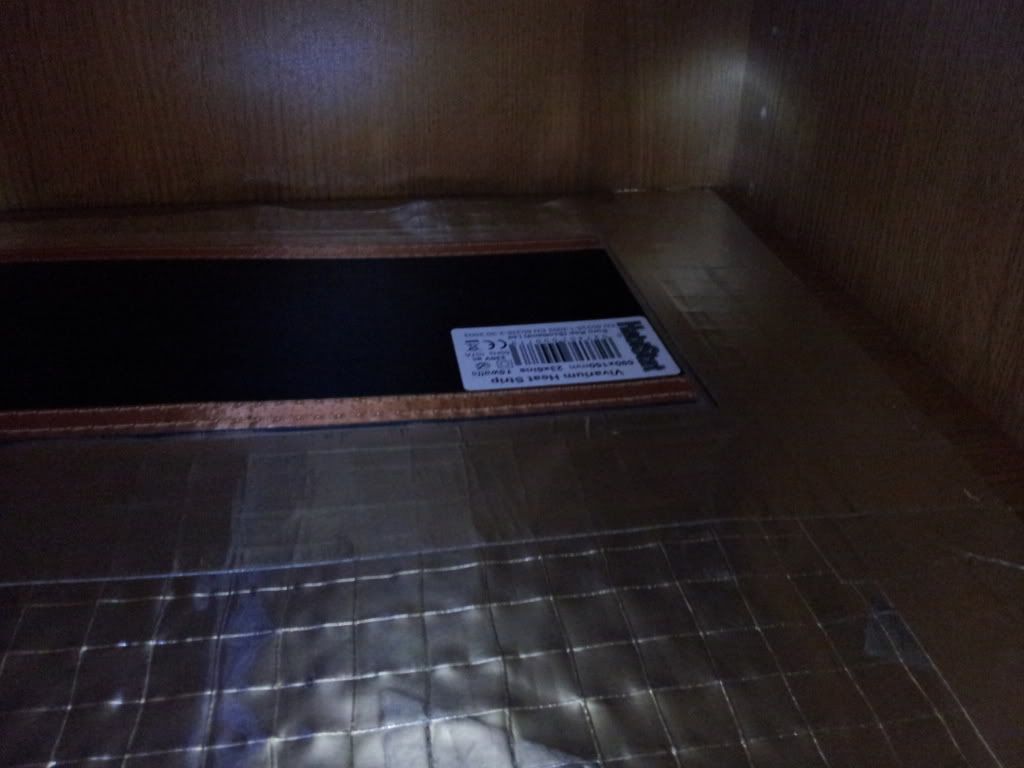
Thread thermostat probe through the hole in back panel from back and secure near center of mat with duct tape or similar
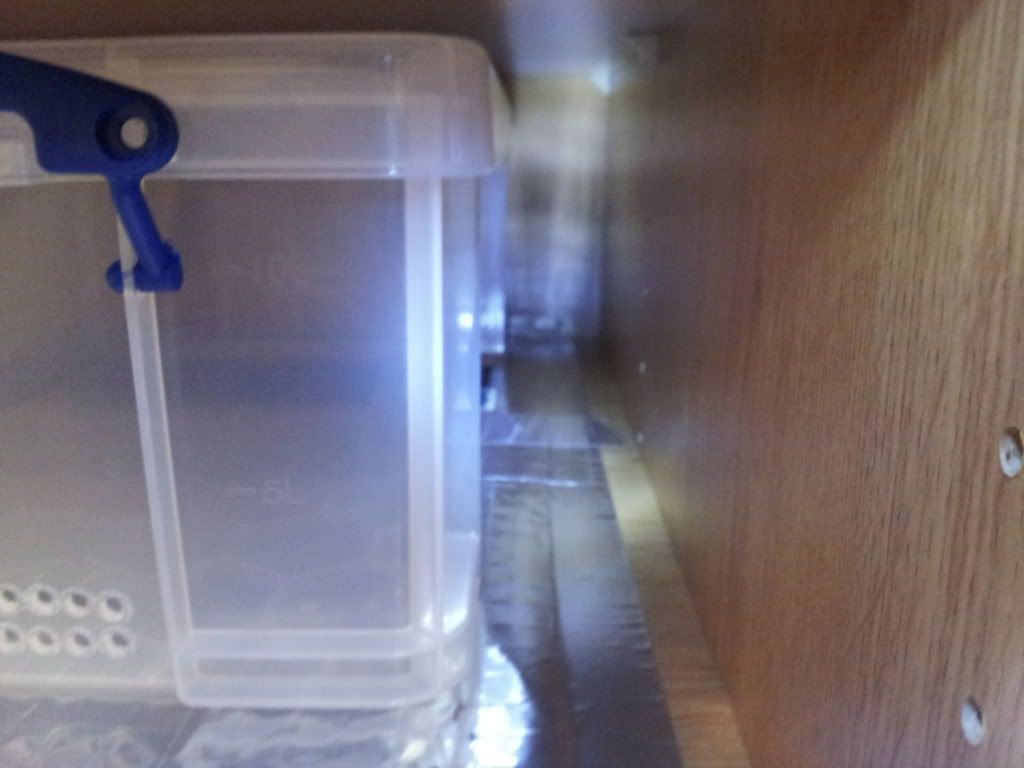
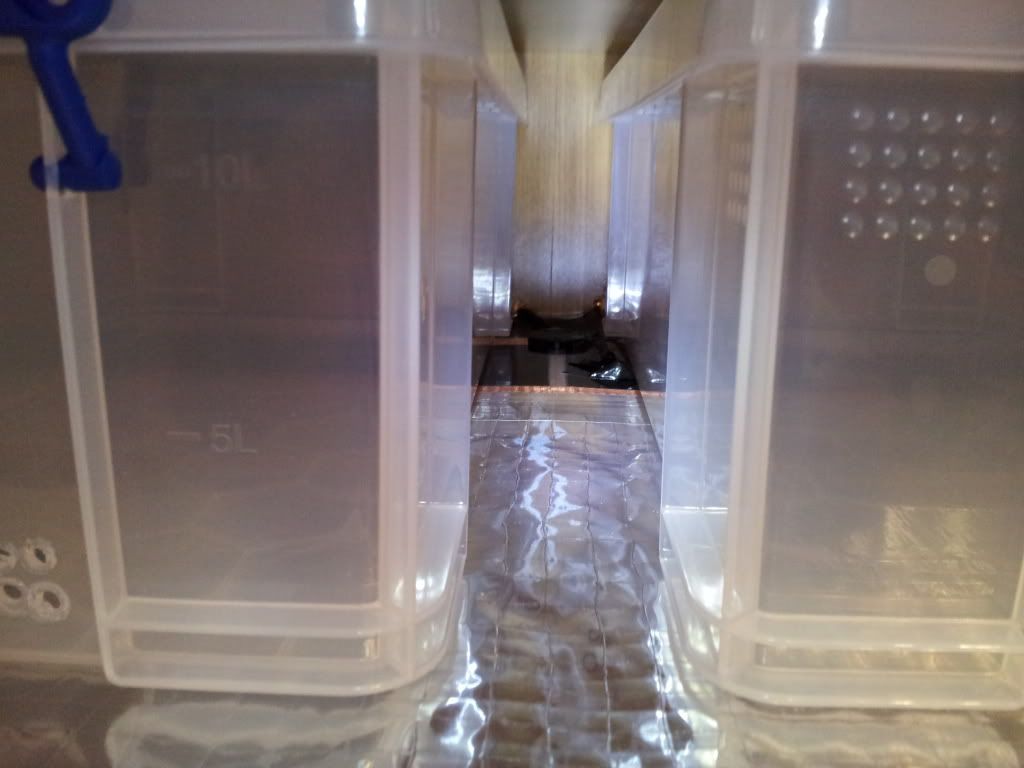
Rubs in place

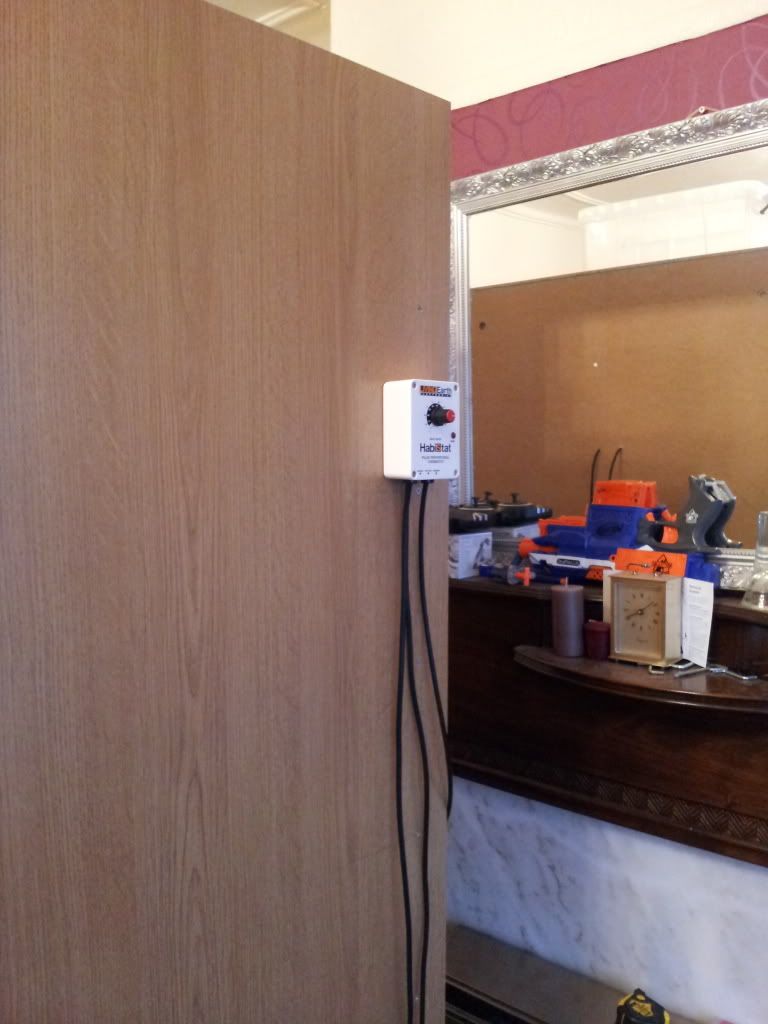
and stat fixed to side
will post the rest tomorrow when its finished
|
3.3.0 Royals,Yellow Belly -Marty,Fire YB-Fred,Mojave-Mo,Butter Pinstripe-Betty,Pewter-Newt,Normal-Molly
0.1.0 Snow Cornsnake- Lumi
1.1.0 Hypo Sonoran Dwarf Boa-Bart and Maggie
0.1.0 Albino Pine Snake-Ruby
1.0.0 Bredli Python-Brian
1.0.0 Western Hognose-Hal
1.0.0 Kayuadi Retic-Kaa
0.1.0 Honduran Milksnake-Jubbly
1.1.0 Salmon Boas-Hershey and Sam
0.2.0 Leopard Geckos-Spot and Chocolate
1.4.0 Dune Geckos
0.1.0 Beardie-Cookie
0.3.7 Tarantulas
0.0.1 Pandinus Imperator/emperor scorpion
|
Edited by - carlb1981 on 19/09/2013 21:31:45 |
|
|
|
phlegmatical
Yearling
United Kingdom
403 Posts |
Posted - 19/09/2013 : 21:44:59
|
| I have the same set up but chose to put my heat strip at the front so they are more active where I can see them |
|
|
|
PythonManDan
Yearling
United Kingdom
150 Posts |
Posted - 19/09/2013 : 22:36:05
|
How do you go on for having a hot end/hot spot so to speak by having the heat mat running along the length of the RUB?
Also nice idea with the rad foil, wish I'd used that before I stuck my mats down in my rack. |
4.0.0 Normal, Pastel, Champagne & Albino Super Pastel Royal Pythons
0.3.0 Pastel, Spider & Albino Spider Royal Pythons
1.0.0 Irian Jaya Carpet Python
0.1.0 Diamond Jungle Jaguar Carpet Python
1.0.0 Diamond Python
2.4.0 Leopard Geckos |
Edited by - PythonManDan on 19/09/2013 22:37:09 |
|
|
|
carlb1981
Fully Grown Royal
United Kingdom
1527 Posts |
Posted - 19/09/2013 : 22:44:33
|
| I have the heat mat running along the back of the rack so only a 6" of the rub is heated by it they still have a cold end to move to if they choose |
3.3.0 Royals,Yellow Belly -Marty,Fire YB-Fred,Mojave-Mo,Butter Pinstripe-Betty,Pewter-Newt,Normal-Molly
0.1.0 Snow Cornsnake- Lumi
1.1.0 Hypo Sonoran Dwarf Boa-Bart and Maggie
0.1.0 Albino Pine Snake-Ruby
1.0.0 Bredli Python-Brian
1.0.0 Western Hognose-Hal
1.0.0 Kayuadi Retic-Kaa
0.1.0 Honduran Milksnake-Jubbly
1.1.0 Salmon Boas-Hershey and Sam
0.2.0 Leopard Geckos-Spot and Chocolate
1.4.0 Dune Geckos
0.1.0 Beardie-Cookie
0.3.7 Tarantulas
0.0.1 Pandinus Imperator/emperor scorpion
|
|
|
|
PythonManDan
Yearling
United Kingdom
150 Posts |
Posted - 20/09/2013 : 08:07:16
|
| I know and it's a great idea as you can have the RUB lengthways on and have them more on 'display' so to speak. I was just on about usually you'd have your hot end and cold end and hide down the hot end over the hot spot. With the heat strips it's gives you a narrower band of hot spot. You bothering with any hides in the RUBs? |
4.0.0 Normal, Pastel, Champagne & Albino Super Pastel Royal Pythons
0.3.0 Pastel, Spider & Albino Spider Royal Pythons
1.0.0 Irian Jaya Carpet Python
0.1.0 Diamond Jungle Jaguar Carpet Python
1.0.0 Diamond Python
2.4.0 Leopard Geckos |
|
|
|
carlb1981
Fully Grown Royal
United Kingdom
1527 Posts |
Posted - 20/09/2013 : 09:35:06
|
| Do you mean the 33l rub i have lengthways on one shelf? If so i was just showing how you could have them i would just use a normal mat at one end for that but im only using 12l rubs in this rack set up as shown sitting on the 6" wide heat strip |
3.3.0 Royals,Yellow Belly -Marty,Fire YB-Fred,Mojave-Mo,Butter Pinstripe-Betty,Pewter-Newt,Normal-Molly
0.1.0 Snow Cornsnake- Lumi
1.1.0 Hypo Sonoran Dwarf Boa-Bart and Maggie
0.1.0 Albino Pine Snake-Ruby
1.0.0 Bredli Python-Brian
1.0.0 Western Hognose-Hal
1.0.0 Kayuadi Retic-Kaa
0.1.0 Honduran Milksnake-Jubbly
1.1.0 Salmon Boas-Hershey and Sam
0.2.0 Leopard Geckos-Spot and Chocolate
1.4.0 Dune Geckos
0.1.0 Beardie-Cookie
0.3.7 Tarantulas
0.0.1 Pandinus Imperator/emperor scorpion
|
|
|
|
PythonManDan
Yearling
United Kingdom
150 Posts |
Posted - 20/09/2013 : 11:29:15
|
| Yeah I was on about the 33L, I'm with you now bud. Nice one. Once again, good build thread, I shall definitely be copying you when I get a PAX. |
4.0.0 Normal, Pastel, Champagne & Albino Super Pastel Royal Pythons
0.3.0 Pastel, Spider & Albino Spider Royal Pythons
1.0.0 Irian Jaya Carpet Python
0.1.0 Diamond Jungle Jaguar Carpet Python
1.0.0 Diamond Python
2.4.0 Leopard Geckos |
|
|
|
carlb1981
Fully Grown Royal
United Kingdom
1527 Posts |
Posted - 20/09/2013 : 21:45:58
|
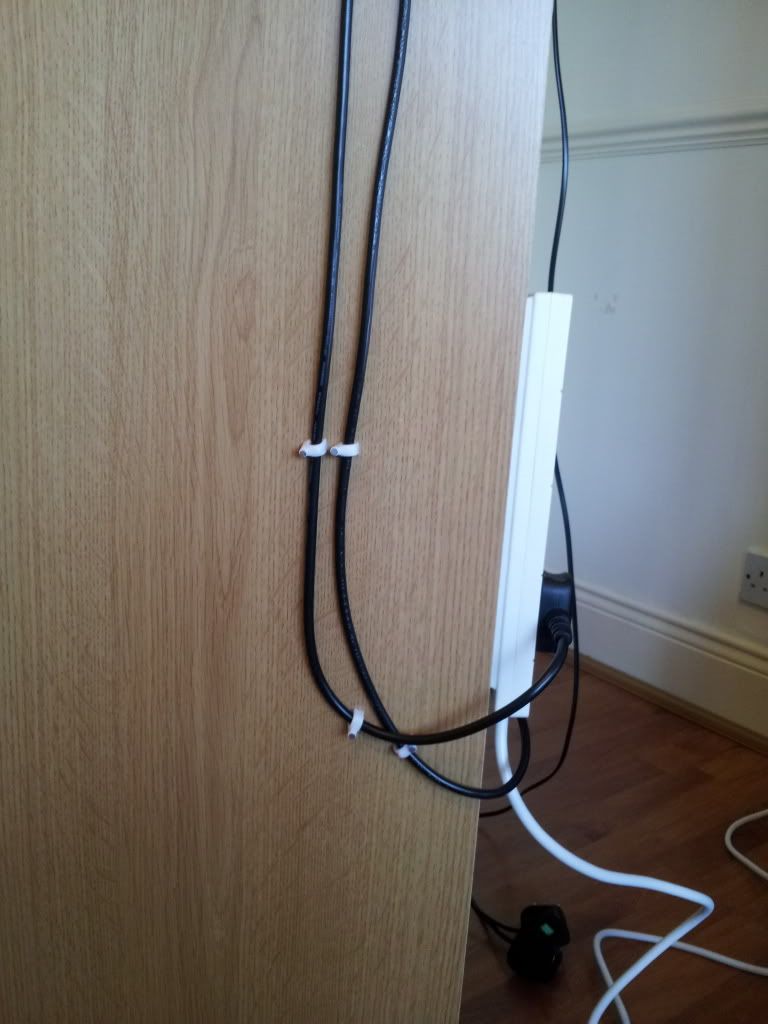
Finally sorting the wiring the left over sticky pads come in handy here
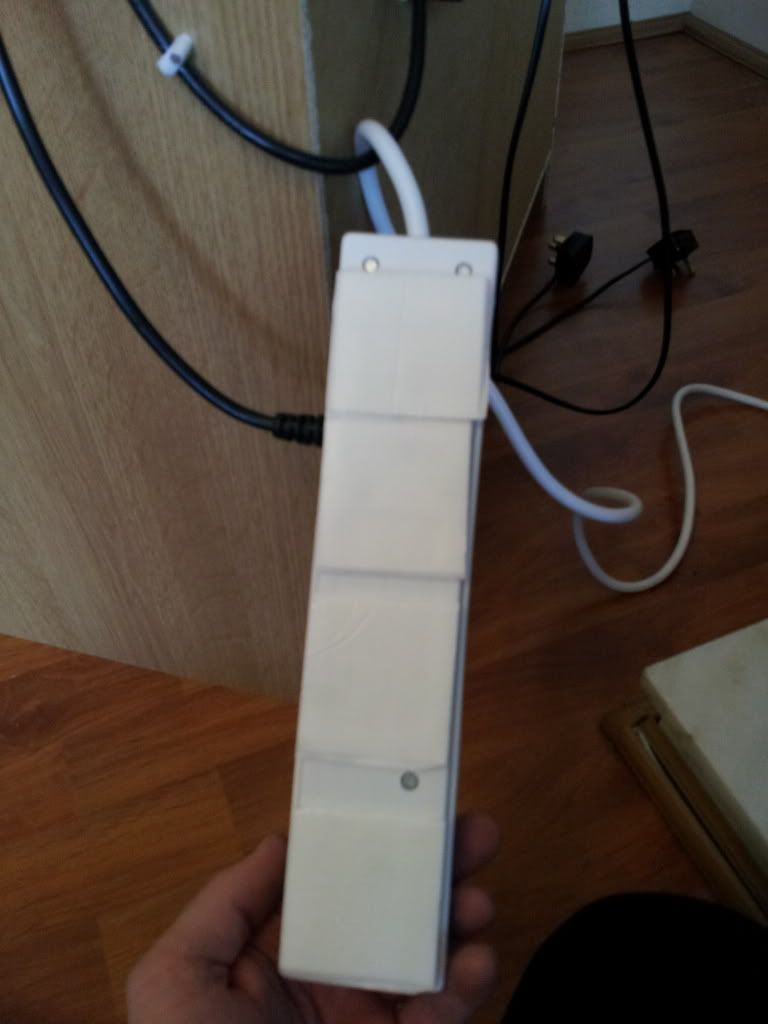
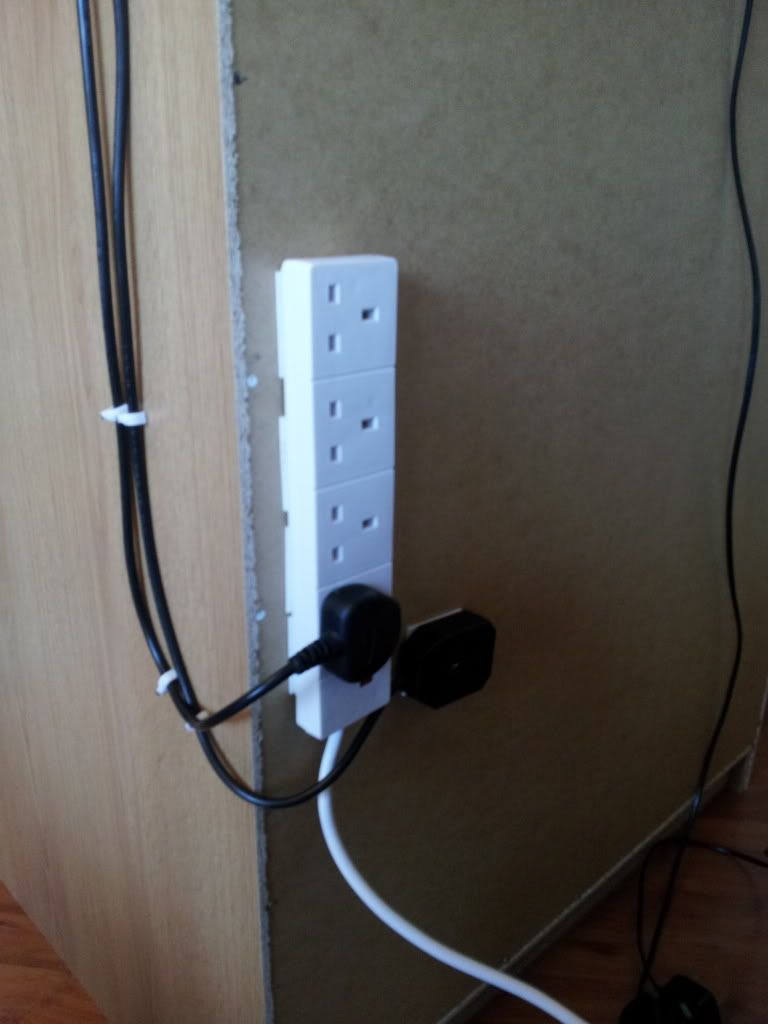
I used 8mm wire securing things(can't remember the name lol) to secure thermostat cables to the side and the sticky pads to secure the extension leads to the back of the rack along with the thermostat power output socket then plugged everything in and taped the loose cables down
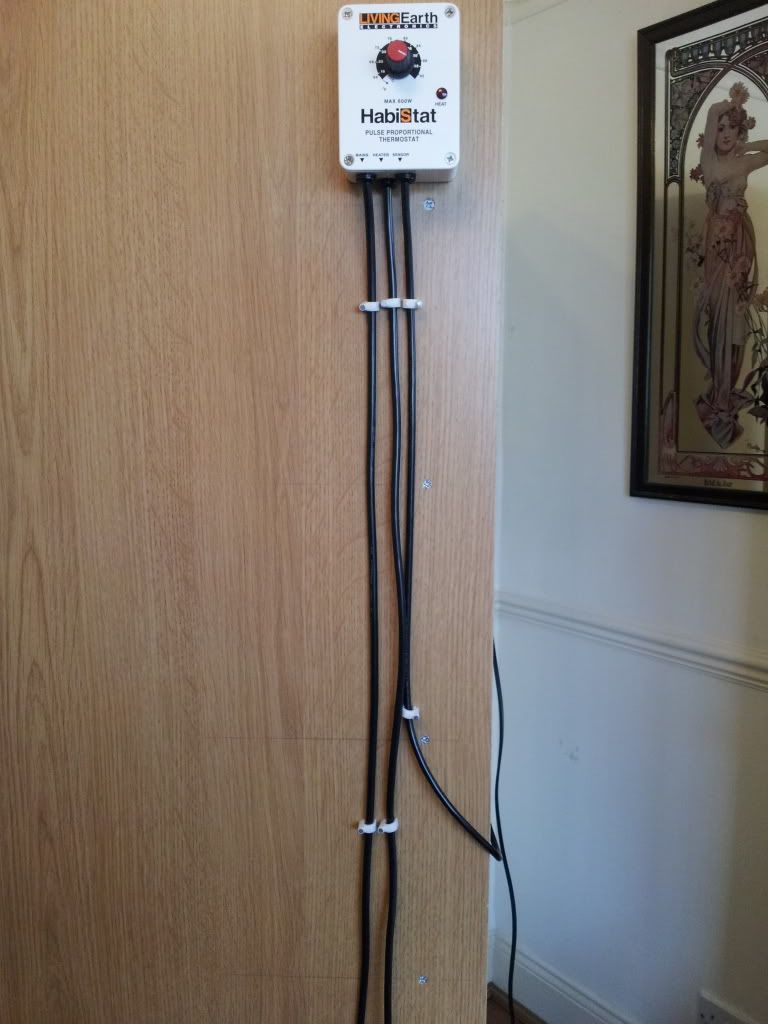
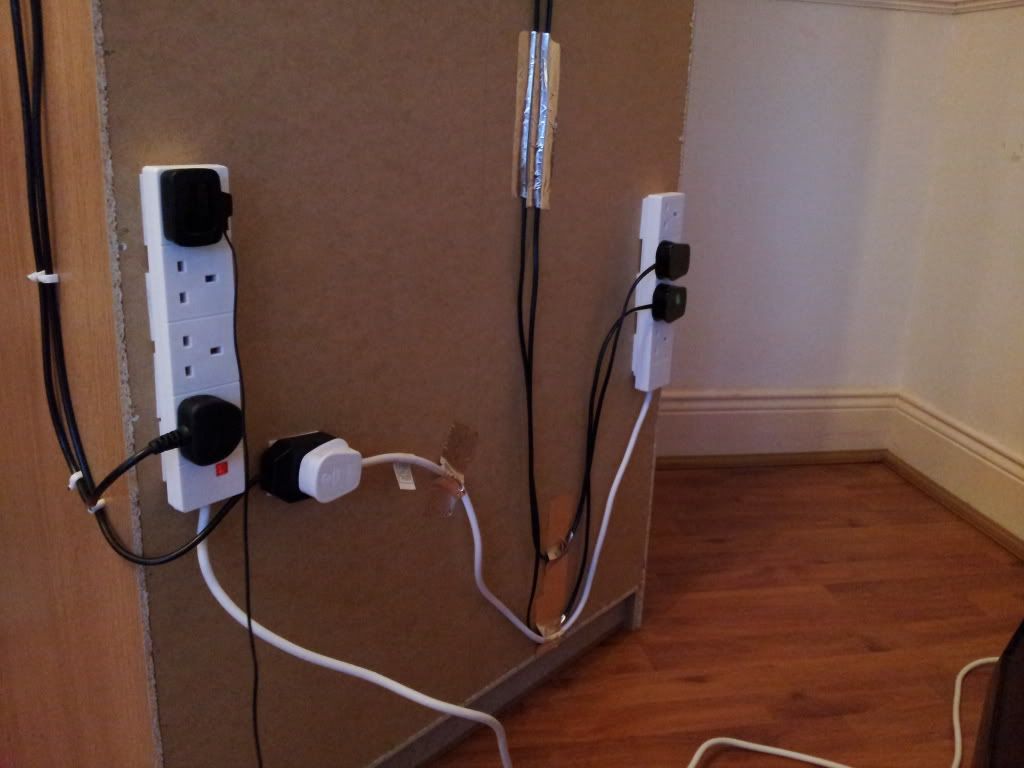
and that's it finished, only have 2 mats in and running at the minute as that's all they had in where i get them from and i need to sort the fridge incubator out which will fit in the bottom so will post another photo when i have that sorted.
All done and waiting for the 3 new occupants
|
3.3.0 Royals,Yellow Belly -Marty,Fire YB-Fred,Mojave-Mo,Butter Pinstripe-Betty,Pewter-Newt,Normal-Molly
0.1.0 Snow Cornsnake- Lumi
1.1.0 Hypo Sonoran Dwarf Boa-Bart and Maggie
0.1.0 Albino Pine Snake-Ruby
1.0.0 Bredli Python-Brian
1.0.0 Western Hognose-Hal
1.0.0 Kayuadi Retic-Kaa
0.1.0 Honduran Milksnake-Jubbly
1.1.0 Salmon Boas-Hershey and Sam
0.2.0 Leopard Geckos-Spot and Chocolate
1.4.0 Dune Geckos
0.1.0 Beardie-Cookie
0.3.7 Tarantulas
0.0.1 Pandinus Imperator/emperor scorpion
|
|
|
|
ShadEO9
Yearling
United Kingdom
126 Posts |
Posted - 13/05/2014 : 19:58:30
|
Thanks for the post,
I think i might have read this when you first posted, but i'm now having a go at building this myself.
My snake collection is growing and this makes perfect sense =) |
 |
|
|
|
ShadEO9
Yearling
United Kingdom
126 Posts |
Posted - 17/05/2014 : 22:34:58
|
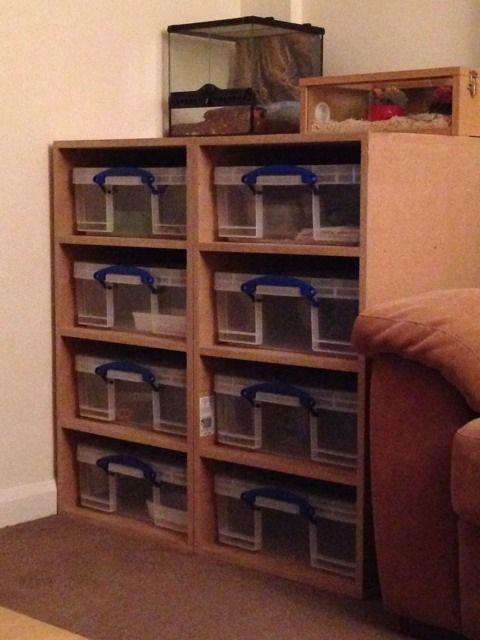
I've finally got myself sorted with a new snake rack.
I was planning on following these steps and create the same racking system, but after a quick browse on the internet managed to find this for a bargain of a price!
 |
|
Edited by - ShadEO9 on 17/05/2014 22:35:32 |
|
|
|
boomslang
Old Royal - I Post too much!
United Kingdom
2025 Posts |
Posted - 18/05/2014 : 16:21:37
|
Looks good :)
quote:
This is the insulation/heat reflection roll and aluminium foil tape i used, bought from homebase
I must get some of this :) |
1.0.0 pinstripe Royal Python
1.0.0 Bumblebee Royal Python
1.0.0 Normal corn
1.0.0 Extreme red Hognose
0.1.0 Extreme red tiger Hognose
1.1.0 yemen chameleons
1.0.0 Piebald yemen
1.0.0 Tamatave panther
1.0.0 Quadricornis
 |
|
|
| |
Topic |
|
